Train Test Split
Train Test Split is an important concept that future Data Scientists or Machine Learning Engineers need to pick up early on. When building models, you’ll want to split your data into two different sets. One for training a model, and one for testing a model.
This article is based on the popular YouTube video on our channel. Feel free to watch the video or read through this article.
Tutorial Prep
Before we jump into this concept let’s prep the tutorial. First import in pandas. After that we need to import in train_test_split.
import pandas as pd from sklearn.model_selection import train_test_split To start we’re going to create a simple dataframe in python. The data on this tutorial is based around baseball hitters and if they have the stats needed to make the hall of fame.
The link to the CSV can be found here: https://github.com/RyanNolanData/YouTubeData
df = pd.read_csv('500hits.csv', encoding = 'latin-1') df.head() 
Creating Features and Target Datasets
Before we split our dataset into training and testing, we should drop any column that we believe isn’t helpful for predicting. In this case, we drop PLAYER as it’s just a name. A name shouldn’t be a predictor if a baseball player should make the hall of fame.
Additionally we will want to split our dataset into features and target. This often is represented by a capital X and lowercase y. We do not want our target in the feature dataset. So for X we drop the PLAYER and HOF columns.
X = df.drop(columns=['PLAYER', 'HOF']) We set y equal to the target we want to predict which is if a player makes the baseball hall of fame.
y = df['HOF'] By utilizing head, we can quickly see the first 5 rows of the features dataset.
X.head() 
Shape will tell us how many rows and columns we have in the dataframe.
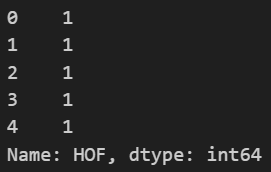
X.shape Now let’s look at y. This should be a series since we only have one target: HOF. This is represented by either a 0 or 1. With 1 being represented as a hall of famer.
y.head() 
The Shape should also tell us we have 465 rows.Â
y.shape Our First Train Test Split
When we train test split, we will create 4 results. A train and test for X and a train and test for Y.
We set these equal to train_test_split. Inside we have the first two parameters which should be out X and y datasets.
You want to have a random_state selected so that the split can be reproduced again. Set this to an integer.
Next you’ll want to define a test_size. The standard is o.2 which would be 20% of our data. It’s good practice to have an 80% training with 20% test split in practice. This can change though depending on the sample size of your data, but this is a good start.
X_train, X_test, y_train, y_test = train_test_split(X, y, random_state=11, test_size=0.2) Let’s once again look at the shape. This time we will look at each of the 4 results.
X_train.shape X_test.shape 
As you can see in X we still have 14 columns. 80% of the data is in the train set with 20% being in the test set.
y_train.shape y_test.shape Y still has the 1 column, with 80% of the data being in the train set and 20% being in the test set.
We can also still look at the head of the new X_train set.
X_train.head() 
It’s also important to examine the output of .describe() after splitting the data to ensure that your training and testing sets have similar distributions.
X_train.describe().round(3) 
X_test.describe().round(3) 
Ryan is a Data Scientist at a fintech company, where he focuses on fraud prevention in underwriting and risk. Before that, he worked as a Data Analyst at a tax software company. He holds a degree in Electrical Engineering from UCF.
