Artificial intelligence is moving fast, and one of the most important innovations for AI workflows is the Model Context Protocol (MCP). Developed by Anthropic, MCP provides a standardized way for AI models to interact with external tools, APIs, and data sources.
If you’re using N8N—whether in the cloud or self-hosted—MCP opens the door to building scalable, modular, and future-proof AI workflows. In this article, we’ll break down what MCP is, how it works in N8N, the differences between cloud and self-hosted setups, and why it could change the way you manage AI agents.
Before we start, if you are looking for help with a n8n project, we are taking on customers. Head over to our n8n Automation Engineer page.
What is Model Context Protocol (MCP)?
Model Context Protocol (MCP) is an open standard that connects AI models to tools and data sources in a consistent, reusable way.
Traditionally, you’d attach tools directly to your AI agent (e.g., “Send Gmail,” “Search Calendar,” etc.). But this quickly becomes messy when you have multiple agents or need to update tools in different places.
MCP solves this by introducing two building blocks:
MCP Server Trigger Node → Defines a set of tools and exposes them via an HTTP endpoint.
MCP Client Tool Node → Connects to MCP servers, letting your AI agents use tools without managing them directly.
This makes workflows cleaner, easier to maintain, and highly scalable.
MCP in N8N Cloud
If you’re using N8N Cloud, MCP makes it simple to centralize your toolsets.
Example: Building a Calendar MCP with tools like:
Read events
Schedule meetings
Cancel meetings
Instead of attaching all three tools to your AI agent, you:
Define them once in the MCP Server Trigger.
Connect with the MCP Client Tool.
Update tools in one place, and every connected agent inherits the changes.
Result: Less duplication, easier maintenance, and consistent updates across multiple workflows.
MCP in Self-Hosted N8N
For self-hosted users, MCP unlocks even more possibilities. You’re not limited to your own tools—you can connect to external MCP servers developed by other companies.
Some popular examples include:
Firecrawl MCP → Perfect for scraping websites and crawling structured content.
Postgres MCP → Useful for database debugging, monitoring, and queries.
This approach is flexible and powerful, but it introduces challenges around data governance and workflow stability. If an external provider updates their MCP tools, your workflow may behave differently. Since MCP is still new, expect governance practices to improve over time.
MCP Connection Types
Currently, MCP supports three types of connections:
SSE (Server-Sent Events) → Deprecated (avoid using this).
HTTP Streamable → The recommended standard for both cloud and self-hosted setups.
Command Line Studio → Available only for self-hosted users; enables deeper customization and community-driven MCP servers.
Alright, now, let’s see some examples.
Example Workflow: Gmail with MCP
Let’s compare a Gmail workflow in traditional N8N vs MCP-powered N8N.
Traditional Setup:
In a traditional N8N workflow without MCP, every tool has to be connected directly to the AI agent. This means if your agent needs to send an email, read inbox messages, or search through Gmail threads, you have to manually attach each Gmail tool node to the workflow.
Steps:
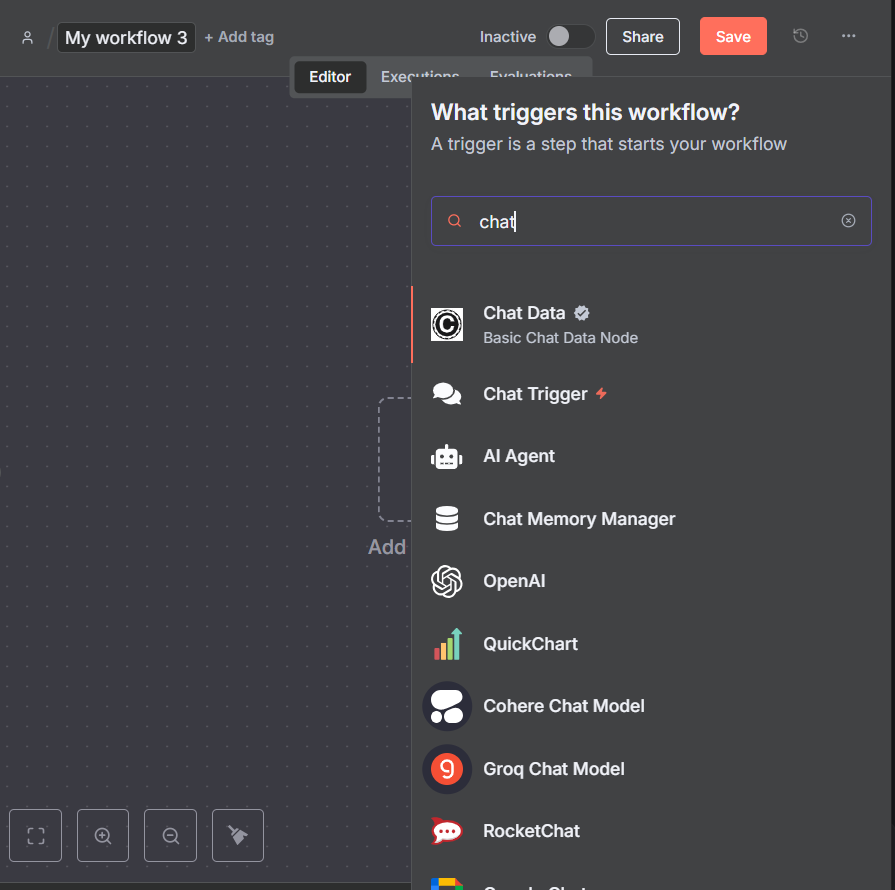
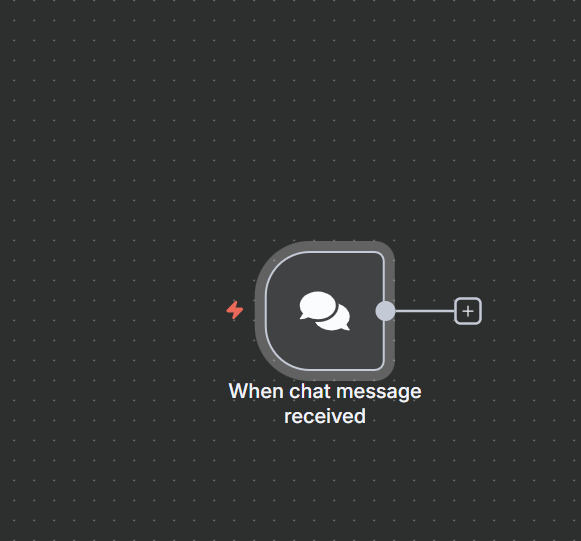
Start with a Chat Trigger
A user sends a message or query through a chatbot, form, or API.
This message triggers the workflow in N8N.
You get the chat node by searching for the “Chart Trigger”.
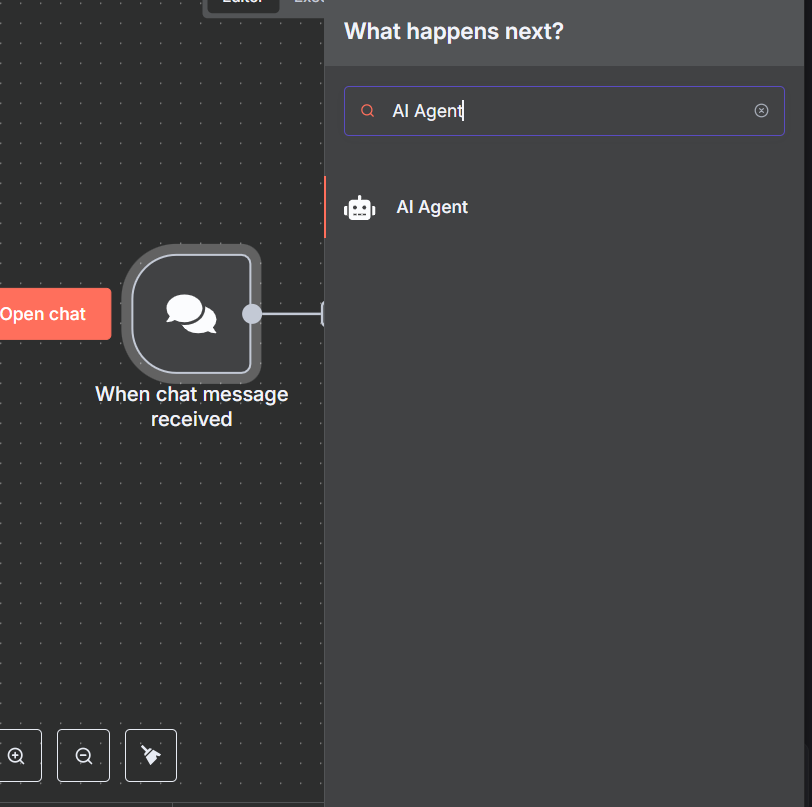
Pass the Input to the AI Agent
The chat message is sent into an AI agent node ( Claude, GPT, or any LLM you’re using). In this case we are using OpenAI
The AI analyzes the intent—for example, “Send an email to my colleague about tomorrow’s meeting.”
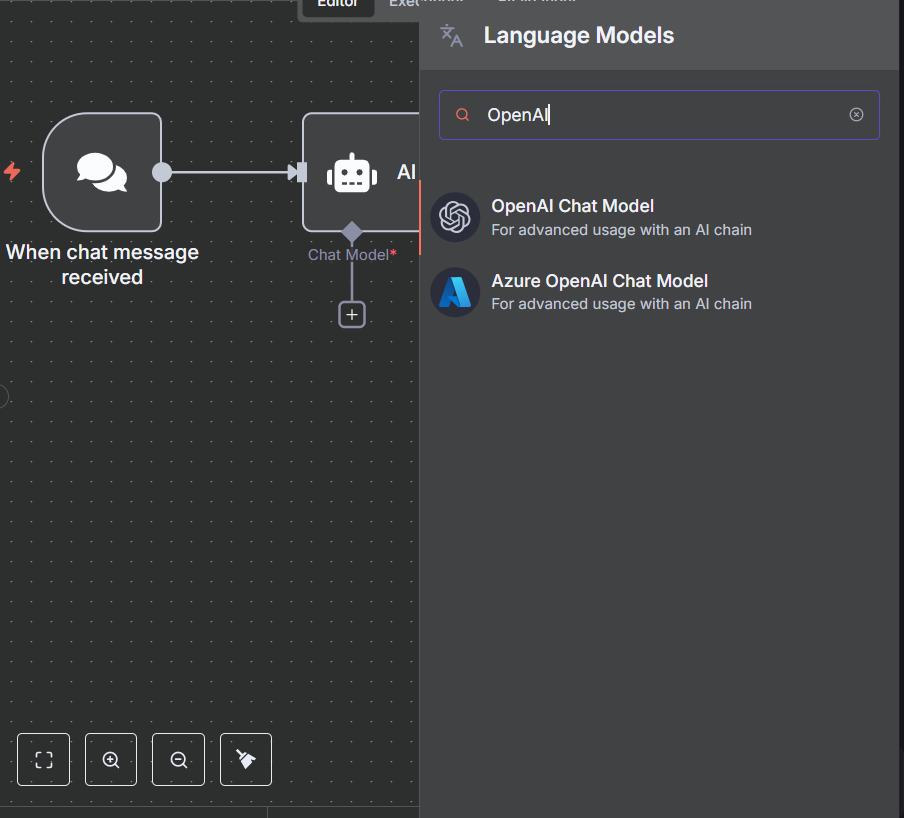
we get the AI agent by searching for it.
We connect the chat model. In this article we used OpenAI.
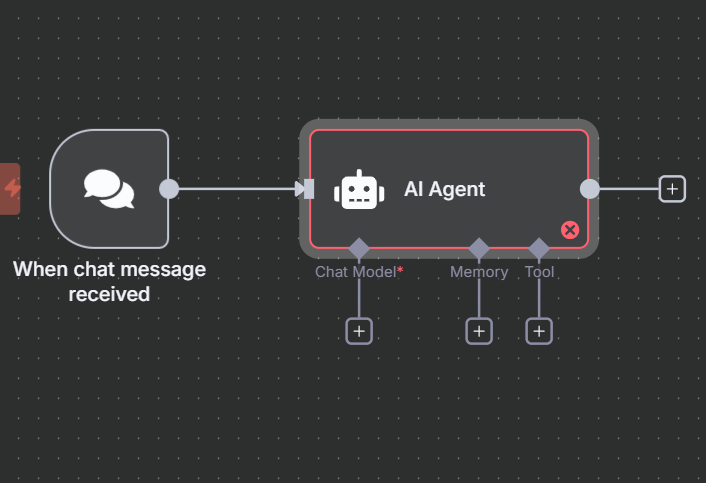
Search and get the OpenAi chat model from the list of language models.
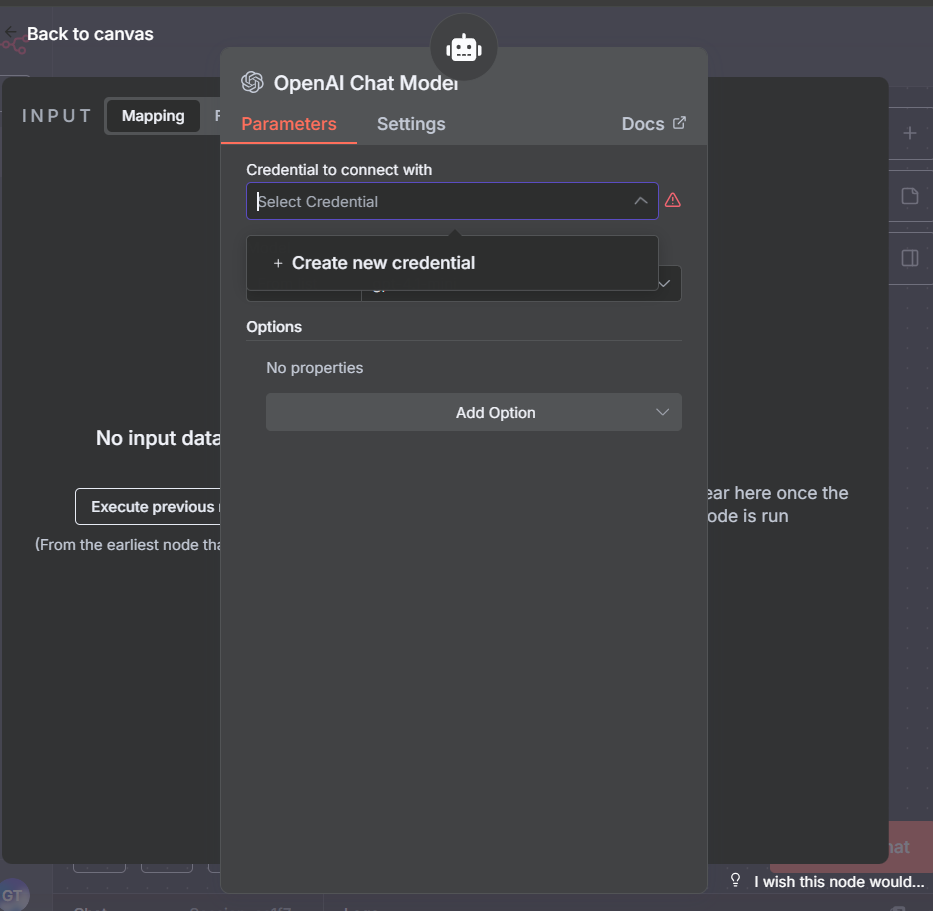
We add the OpenAI credentials.
You can get this from your OpenAI account

Attach Direct Gmail Tools
For each action the AI might need, you add a specific Gmail node:
Send Gmail → to send a message.
Read Gmail → to fetch the inbox or unread messages.
Search Gmail → to look for specific threads or keywords.
These tools are bound to the agent, so if you want to add more Gmail actions, you need to manually update the workflow.
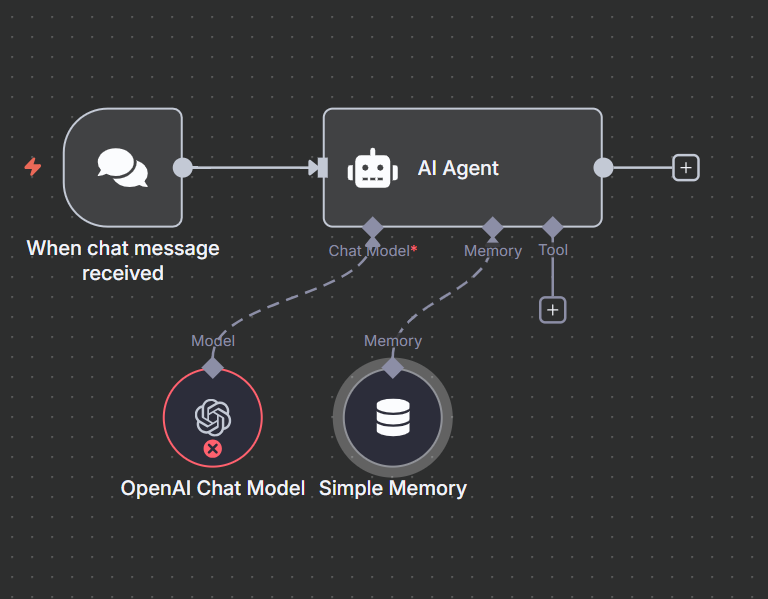
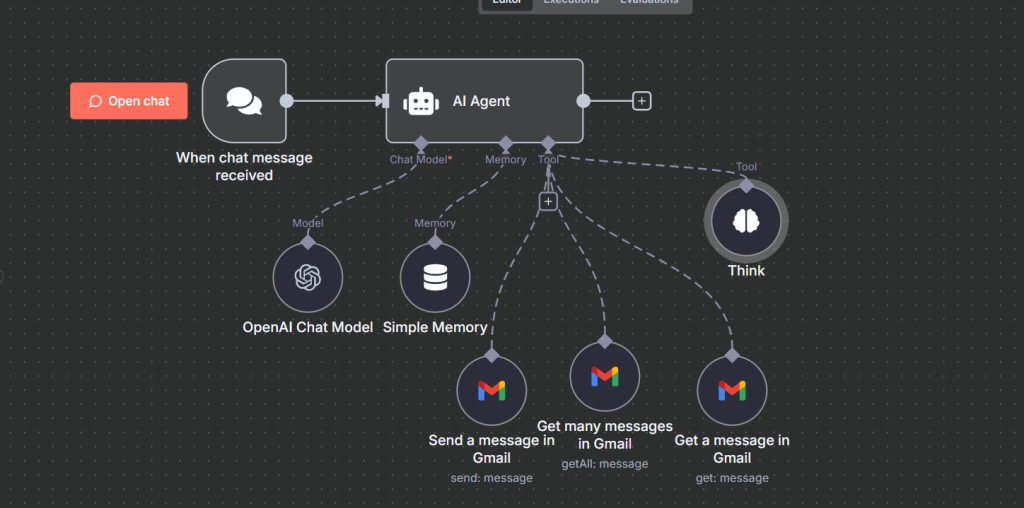
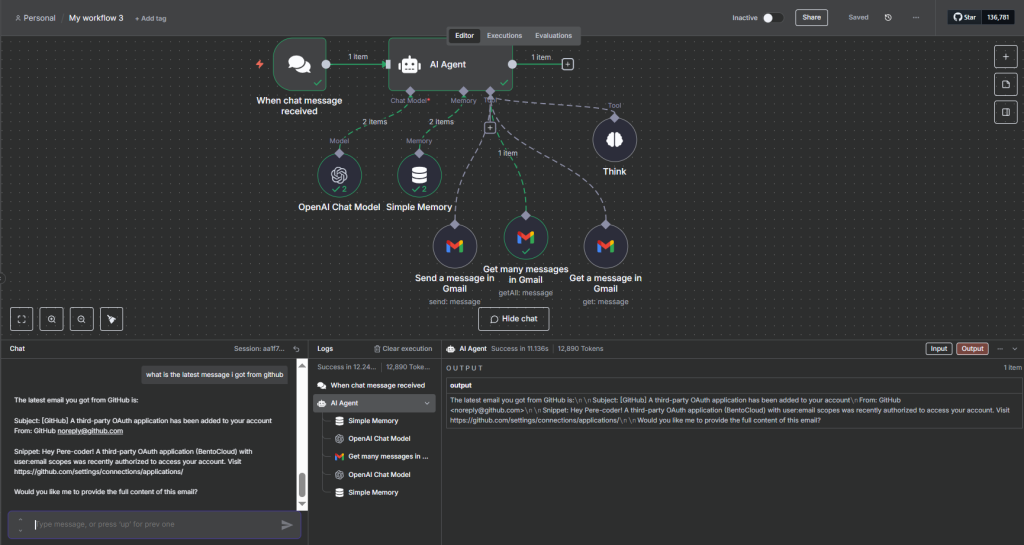
In this Article we use the send gmail, read gmail and search gmail,, but before that, let’s add a Simple memory.
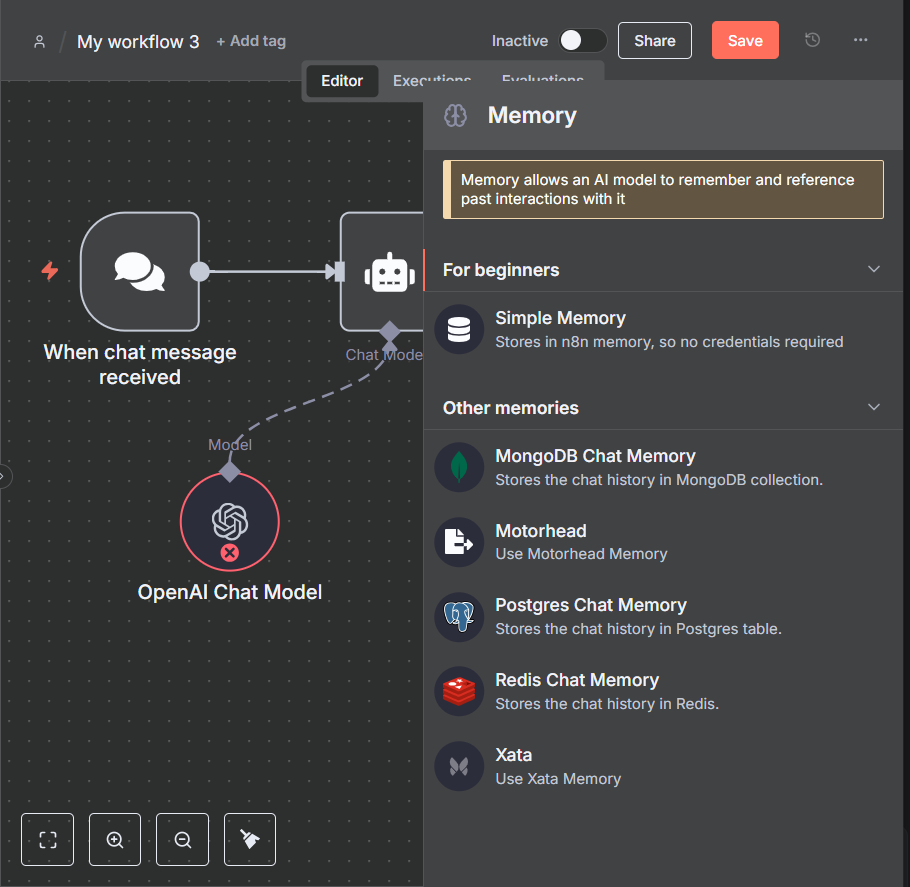
The “Simple Memory” node in N8N is used to give your AI agent short-term memory during a workflow. Think of it as the agent’s scratchpad — it stores the conversation history or context so the model can refer back to it when deciding what to do next.
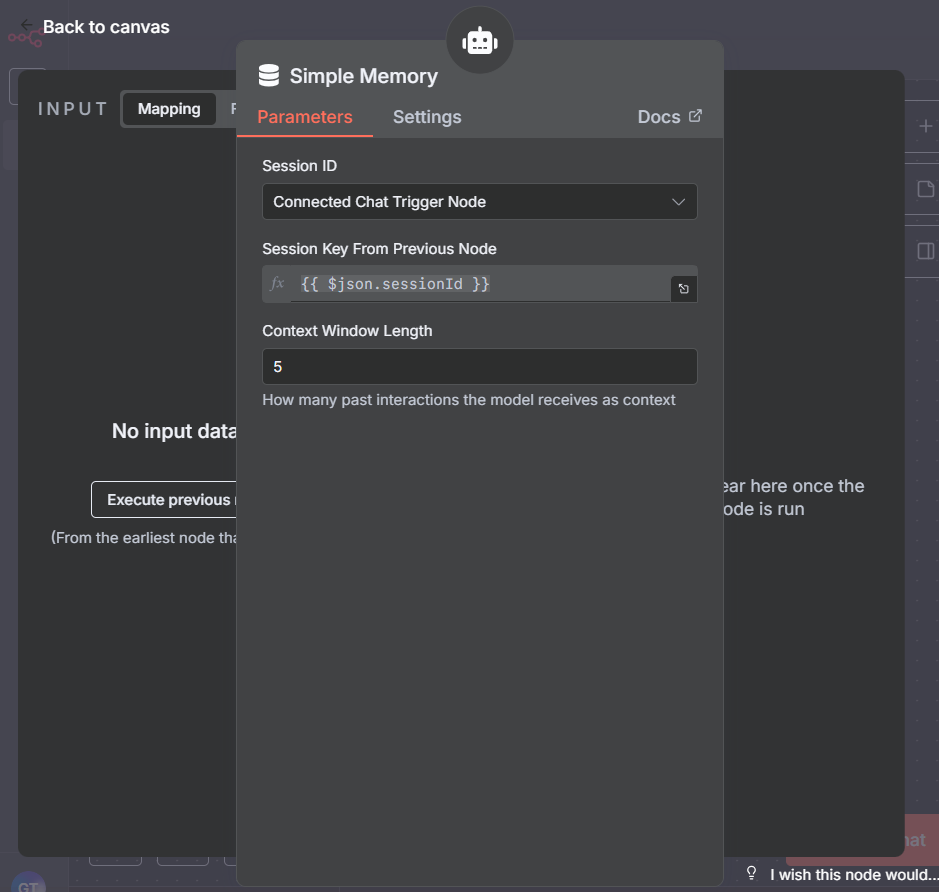
Simple Memory node
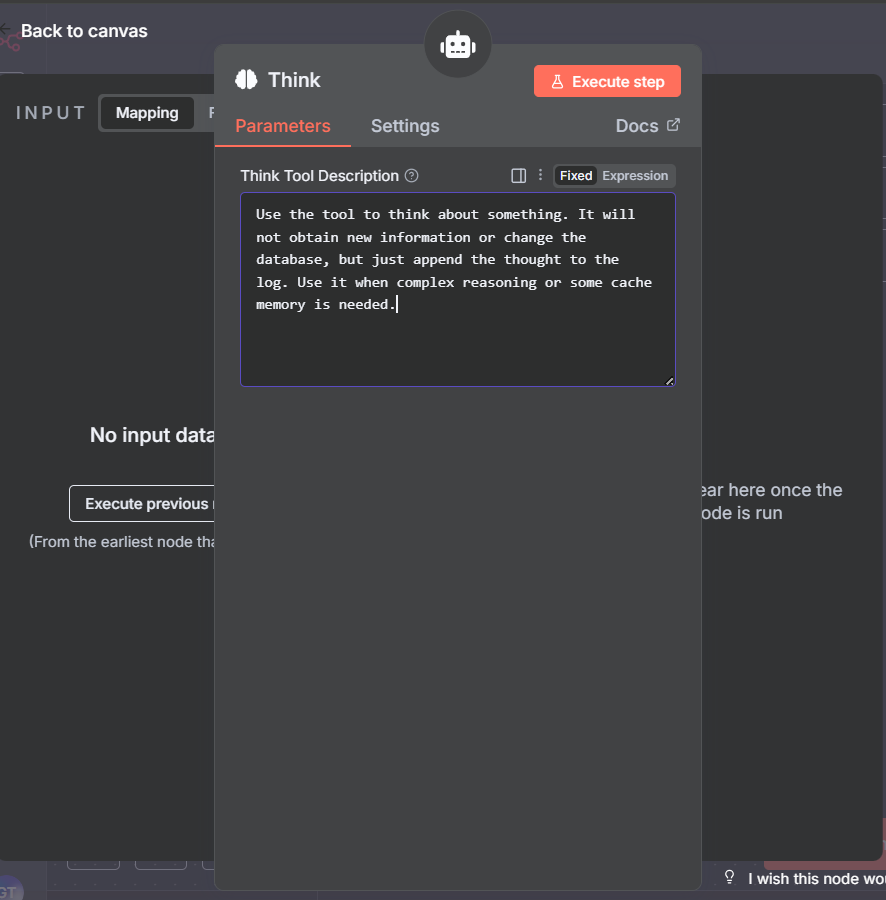
Next right before we add the gmail node, let’s add the think node.
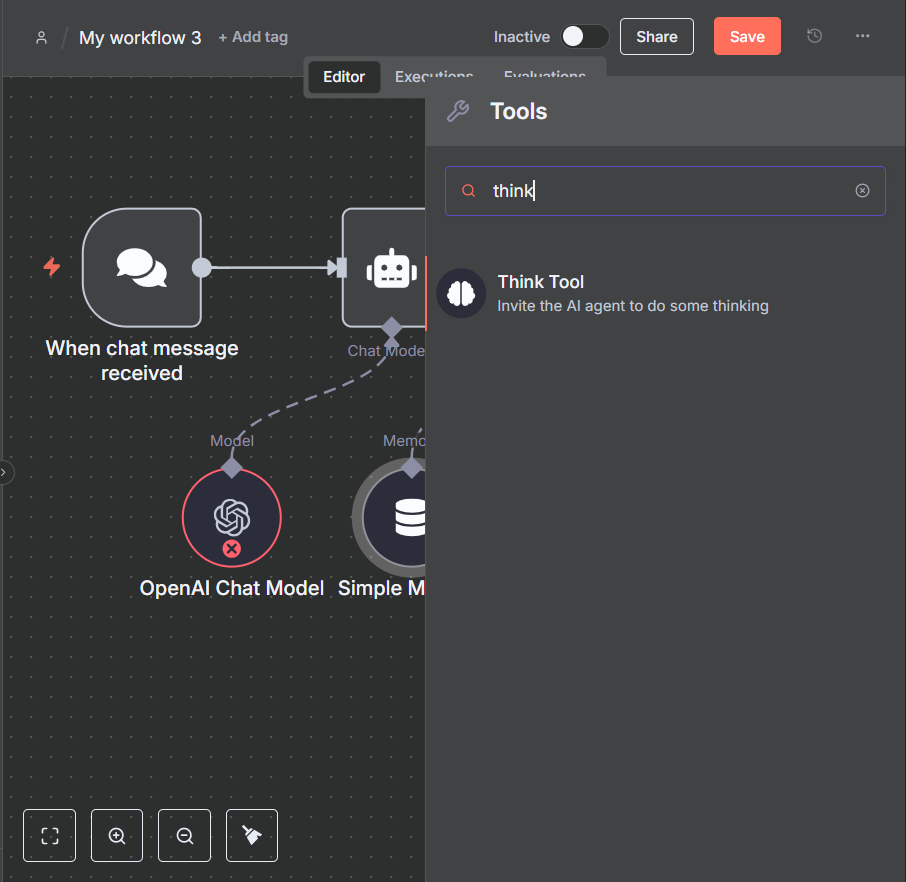
The “Think” node in N8N is a special node introduced to help when you’re working with AI agents. It’s essentially a reasoning step — a place where the AI can “pause” and decide what to do next before moving on in the workflow.
Finally we add the gmail node.

we add three gmail tools node for sending a message, getting many messages and getting a single message. you can add more if you want.
Please refer to the video for more information on this.
Execute the Tools Individually
When the agent decides on an action (e.g., “send email”), it directly calls the “Send Gmail” node.
Each tool is executed separately, and results are passed back to the agent.
Return the Response
The AI processes the results (e.g., confirmation that an email was sent).
The final response is sent back to the user through the chat interface.
Key Limitation of Traditional Setup
Every new tool requires manual setup inside the workflow.
If you need the same Gmail tools across multiple agents or workflows, you have to duplicate them.
Updates (like changing API credentials or tool behavior) need to be applied in every workflow that uses them.
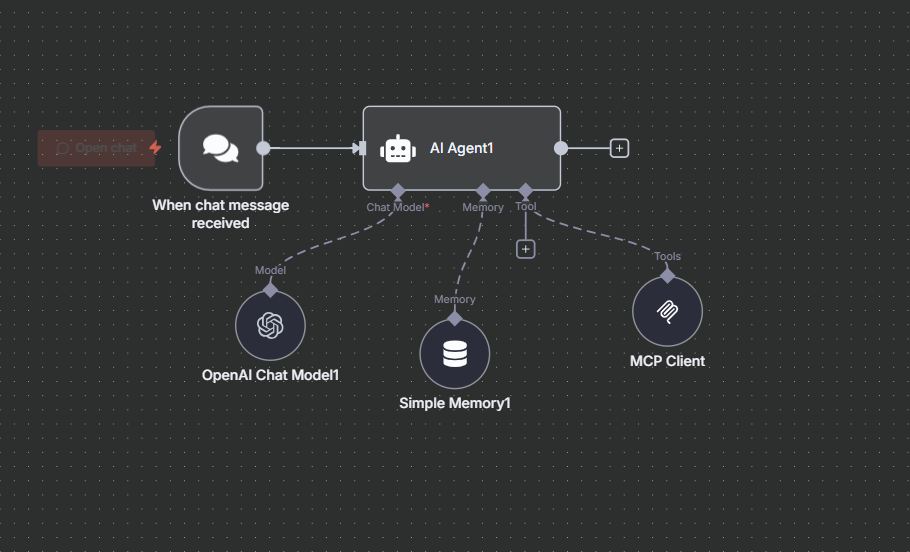
MCP Setup (With Model Context Protocol)
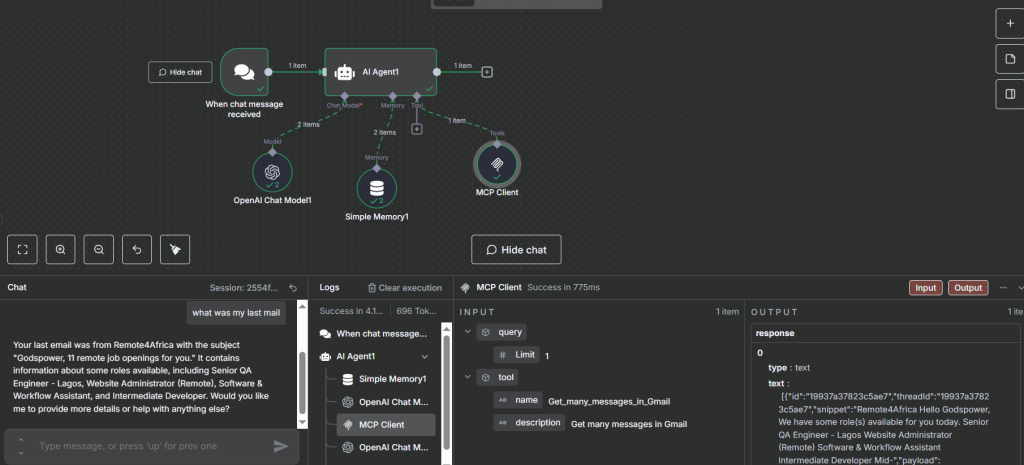
With MCP, the workflow architecture becomes much cleaner and easier to manage. Instead of connecting each Gmail tool directly to the AI agent, you group all related tools inside an MCP Server Trigger and then connect the AI to it through a single MCP Client Tool.
Start with a Chat Trigger
Just like in the traditional setup, the workflow begins when a user sends a query.
Pass Input to the AI Agent
The AI agent analyzes the request and determines the user’s intent.
Instead of worrying about multiple Gmail tools directly, the agent knows it has access to a single MCP Client that can route requests to Gmail actions.
MCP Client Tool Handles the Request
The AI agent calls the MCP Client Tool.
The client doesn’t have Gmail logic itself — it simply connects to an MCP Server that exposes all Gmail capabilities.
This means the agent doesn’t need to know about individual tools like Send Gmail or Search Gmail — it only knows: “I can use the Gmail MCP.”
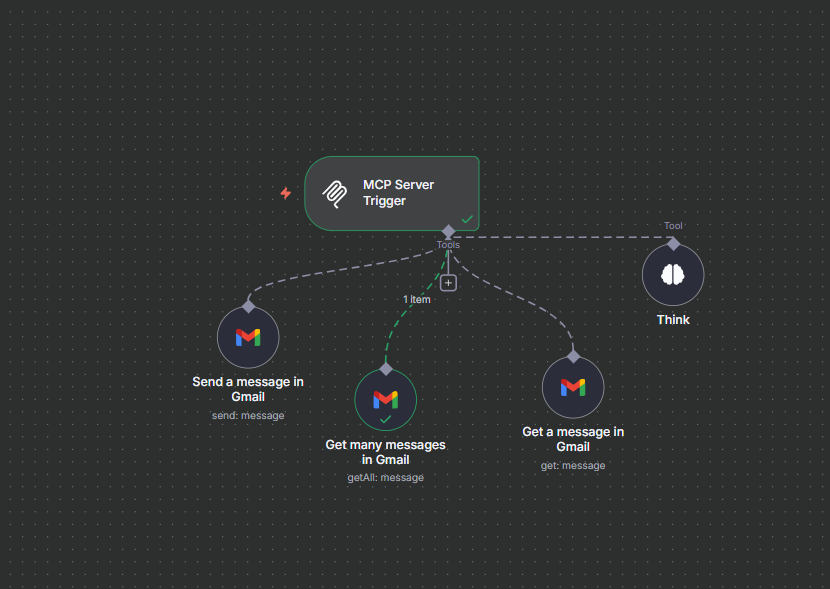
MCP Server Trigger Executes Gmail Tools
The MCP Server Trigger contains all the Gmail tools you’ve defined (Send, Read, Search, etc.).
When the MCP Client makes a request, the Server Trigger picks the right Gmail tool and executes it.
This keeps tool definitions centralized and reusable.
Note if in test mode, you have to keep the MCP server running.
Ensure you pass the url to the MCP client.
Basically copy and paste it in the MCP client url slot.
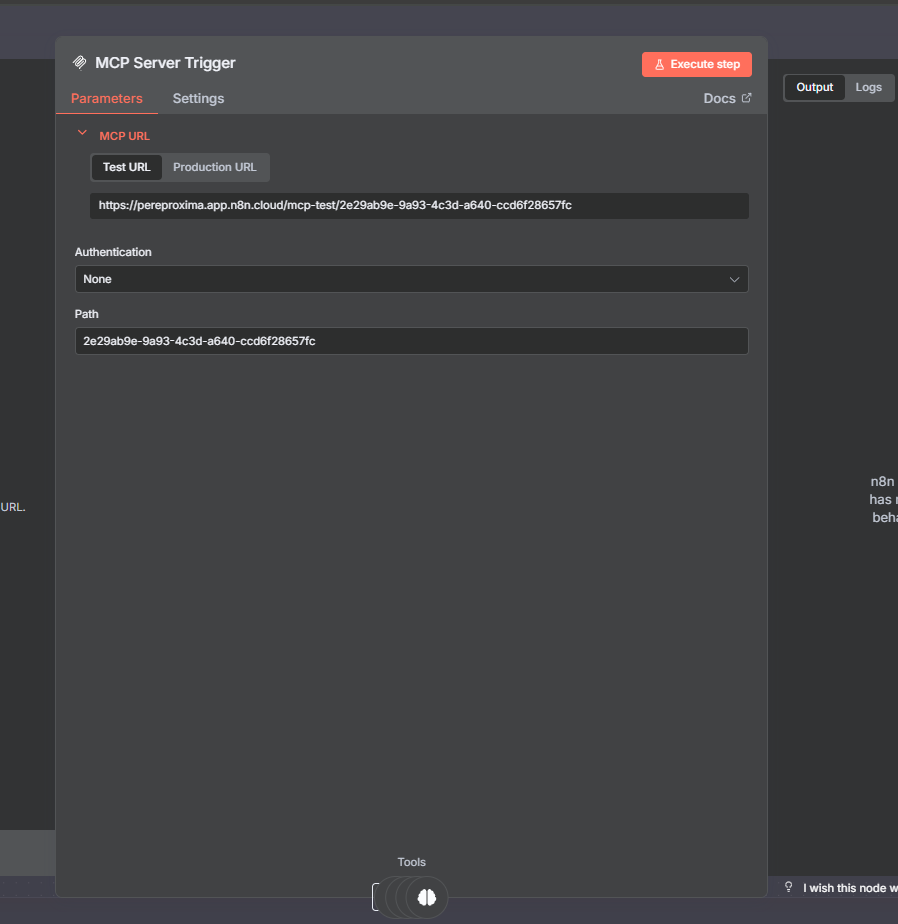
MCP server work flow.
Return Results to the AI Agent
The MCP Server sends back the results.
The MCP Client passes the response back to the AI agent.
The agent then formulates a natural-language reply to the user.
Why MCP Setup is Better
Single Connection
Instead of attaching multiple Gmail nodes, the AI agent only talks to one MCP Client node.
Cleaner workflows, fewer moving parts.
Centralized Tool Management
All Gmail logic lives in the MCP Server Trigger.
Update once, apply everywhere.
Scalable Across Agents
If you have multiple agents (e.g., for sales, support, HR), they can all connect to the same MCP Gmail server.
No need to duplicate Gmail tool setups in every workflow.
Future-Proof
Want to add new Gmail tools like Draft email or Delete email?
Just add them to the MCP Server — every connected agent automatically gains access.
Installing MCP Nodes in Self-Hosted n8n
To use MCP in a self-hosted setup, you’ll need to install the community MCP nodes. Here’s how:
Open Settings
In your self-hosted n8n instance, click the three-dot menu and go to Settings.
Enable Community Nodes
Find the Community Nodes option and confirm you understand the risks.
Install the MCP Package
Search for
n8n-nodes-mcp.Click Install.
Create a New Workflow
Start with a Chat Trigger.
Add an MCP Client node to connect to your MCP server.
Configure the endpoint (testing vs production) and transport (HTTP Streamable).
Activate the Workflow
For production setups, switch the endpoint to Production.
Enable authentication for security (e.g., API keys).
Once installed, your self-hosted n8n instance can both expose MCP servers and consume external MCP servers, unlocking powerful AI + automation use cases.
Summary
Thank you for reading this article. Make sure to check out our other n8n content on the website. If you need any help with n8n workflows we are taking on customers so reach out!
