n8n Loop Over Items Node: Step-by-Step 2026 Tutorial
The n8n Loop Over Items node (also called Split in Batches) is one of the most misunderstood nodes in n8n. Most people coming from a programming background assume you need it for any kind of looping logic, the way you would use a for loop in Python or JavaScript. In practice, the n8n Loop Over Items node is only needed in a handful of specific situations.
This guide covers exactly what the Loop Over Items node does, when you should skip it entirely, and two real workflow examples showing basic and advanced usage, including how to handle conditional logic inside a loop without breaking your item counts.
What Is the n8n Loop Over Items Node?
The n8n Loop Over Items node splits a set of items into smaller batches and processes each batch one at a time. It is designed for batch processing, specifically for situations where you need to slow down how fast data moves through your workflow.
The most common reason to use it is rate limiting. If an API you are calling only allows 10 requests every 10 seconds, the Loop Over Items node lets you send 10 items, pause with a Wait node, then send the next 10, and so on until all items are processed.
n8n Loop Over Items Node: Quick Definition
The Loop Over Items node (also labeled “Split in Batches” in n8n) divides your data into fixed-size batches and iterates through them one batch at a time. Use it when you need to control the speed of your workflow to avoid API rate limits or website scraping blocks. For normal item-by-item processing, you do NOT need this node. n8n handles that automatically.
Loop Over Items vs Split in Batches: Same Node
When you search for “Loop Over Items” in n8n, the node also shows “Split in Batches” in parentheses. These are the same node with two names. “Split in Batches” better describes what it technically does, while “Loop Over Items” describes how most people think about it conceptually.
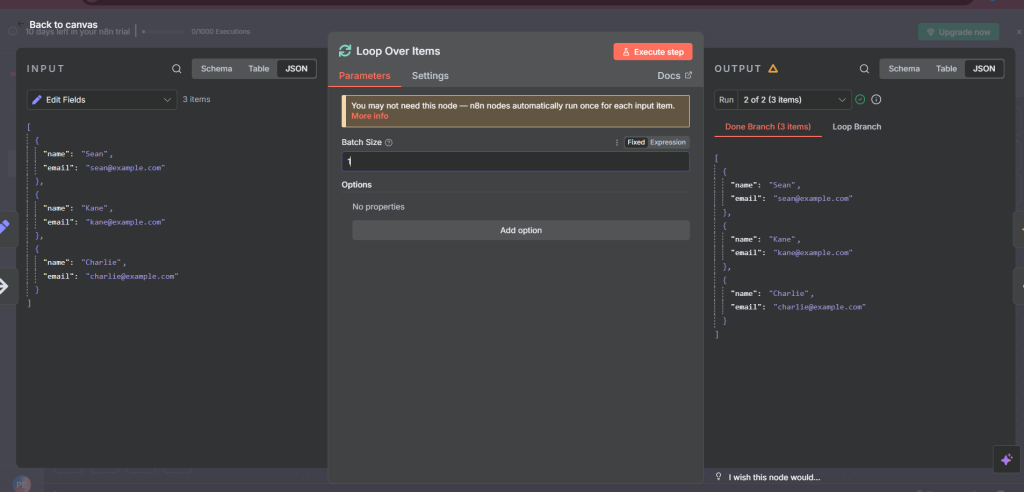
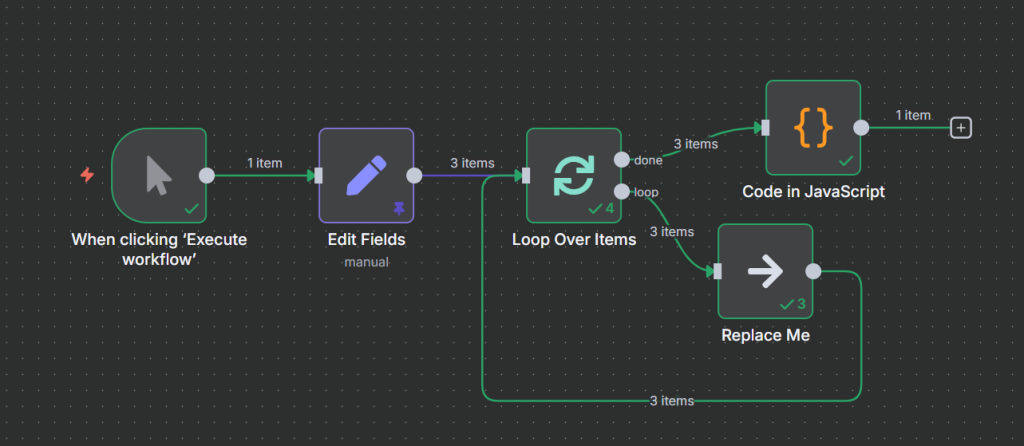
When you add the Loop Over Items node to a workflow, n8n automatically adds a second placeholder node connected to it. This placeholder is where you put your processing logic (for example, an Append Row to Google Sheets node). The loop itself has two output branches: “loop” (which processes the next batch) and “done” (which fires once all batches are finished).

When You Don’t Need the n8n Loop Over Items Node
Here is the most important thing to understand about n8n: every node in n8n already processes items one at a time automatically. You do not need the Loop Over Items node to iterate over a list of items.
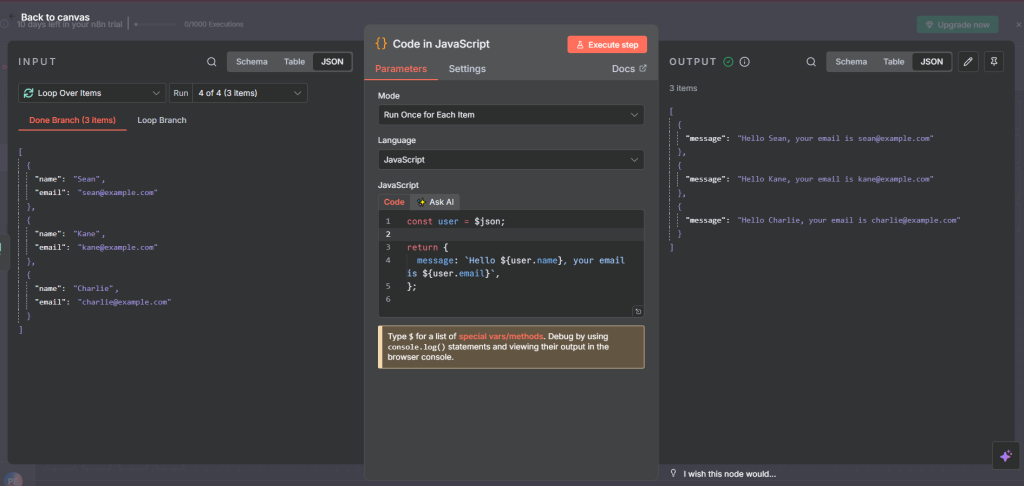
For example, if you have a list of 3 sports passed into an AI agent, n8n will run the AI agent once for item 1 (baseball), once for item 2 (cricket), and once for item 3 (basketball), then collect all 3 results before moving to the next node. This happens without any loop node at all.
n8n even warns you about this directly in the Loop Over Items node description: “You may not need this node. Nodes automatically run once for each input item.”
Adding the Loop Over Items node when you do not need it creates extra complexity. You get more nodes, more points of failure, and a workflow that is harder to read and debug. Keep your workflows as simple as possible.
When You Do Need the n8n Loop Over Items Node
The Loop Over Items node is the right tool in two main situations: API rate limiting and web scraping.
API Rate Limiting
Most APIs limit how many requests you can make in a given time window. Google Sheets, HubSpot, Airtable, and nearly every other service you might connect to in n8n has documented rate limits. If you send too much data too fast, the API will reject your requests with rate limit errors.
The Loop Over Items node solves this by processing a fixed number of items (your batch size), waiting a set amount of time, then processing the next batch. This lets you work within API rate limits while still processing large datasets automatically.
Check the developer documentation for the API you are using to find its rate limit. You can also search the API name plus “rate limits” in Perplexity or similar tools, which will usually surface the official documentation with citations.
Web Scraping
If you are scraping a website, going too fast will get your requests blocked. Websites often limit how many pages can be scraped per second or per minute. The Loop Over Items node with a Wait node lets you scrape at a controlled rate to avoid being blocked.
Keep in mind that not all websites allow scraping. Always check a website’s terms of service and robots.txt file before scraping it.
Note: Some Nodes Have Built-In Batching
Before adding the Loop Over Items node, check whether the n8n node you are using already has built-in batching. Some nodes handle rate limiting internally, which means you may not need to add a Loop Over Items node at all.
Join Our AI Community
How to Configure the n8n Loop Over Items Node
Batch Size
The most important setting in the Loop Over Items node is the batch size. This controls how many items are sent through the loop in each pass. The default batch size is 1, meaning items are processed one at a time.
You can increase the batch size to 10, 50, 100, or any number that fits within your API’s rate limits. For most use cases, a batch size of 10 is a reasonable starting point. Adjust it based on the rate limit documentation for the specific API you are calling.
The Batch Size Formula
Use this formula to calculate how many times your loop will run:
Total Items / Batch Size = Number of Loop Runs
Example: 100 items / batch size 10 = 10 loop runs
Example: 91 items / batch size 20 = 5 loop runs (4 full runs of 20 = 80 items, then 1 final run of 11 items)
The numbers do not need to divide evenly. If you have 91 items and a batch size of 20, the loop runs 4 full batches of 20 (80 items) and then one final batch of 11 items, for 5 total runs.
Adding a Wait Node
A Wait node should almost always accompany the Loop Over Items node. Without a Wait node, the loop runs as fast as possible, which defeats the purpose of batching for rate limiting.
Place the Wait node after your processing logic (for example, after your Append Row to Sheets node) and before the loop cycles back. Set the wait time based on the API rate limit. For most use cases, 1 to 5 seconds between batches works well.
The Wait node supports seconds, minutes, hours, and days. A 2-second wait between batches of 10 items is a common configuration for Google Sheets uploads.
Example 1: Upload 100 Rows to Google Sheets with Rate Limiting
This example shows how to upload 100 baseball hall of famers to Google Sheets in batches of 10, with a 2-second wait between each batch.
Here is the full workflow setup:
- Manual Trigger: starts the workflow
- Edit Fields node: contains the array of 100 player names
- Split Out node: converts the array into 100 individual items
- Loop Over Items node: batch size set to 10
- Google Sheets Append Row node: adds the player name to the Hall of Fame tab
- Wait node: pauses for 2 seconds
- (loop cycles back for the next 10 items)
- Done branch: fires after all 100 items are processed
With 100 items and a batch size of 10, the loop runs exactly 10 times. After each batch of 10 rows is appended, the workflow waits 2 seconds before sending the next 10. When all 100 rows are done, the “done” output branch fires and you can see all 100 items confirmed there.
To verify the loop ran correctly, check the item count on the “done” branch at the end of the workflow. It should match the total number of items you started with (100 in this example).
The complete workflow:
Advanced Example: Conditional Logic Inside a Loop
A common and more complex scenario is when you need to apply conditional logic inside a loop. For example, you might want to send active players to one place and retired players to another. This is where the Loop Over Items node becomes tricky and a common source of bugs.
The Problem: Mismatched Item Counts
When you add an If node inside a loop, your items split into two branches: true (active players) and false (retired players). If these branches reconnect to the loop independently, the item count coming out of the loop no longer matches what went in. The “done” branch shows a ballooned number because items are being counted multiple times.
For example: 20 items go into the loop, split into 12 active and 8 retired by the If node. If both branches connect back to the loop separately, the loop sees more than 20 inputs, causing miscounts and potential errors.
The Fix: Use a Merge Node Before the Wait
The solution is to merge both branches of the If node back into a single stream before the Wait node. This ensures the loop always receives the same number of items it sent out, keeping the 1:1 input/output ratio intact.
Here is the corrected workflow structure:
- Loop Over Items node (batch size 20)
- If node: checks if player status is “active”
- True branch: processes active players (e.g., Append Row to Active tab in Sheets)
- False branch: processes retired players (e.g., Append Row to Hall of Fame tab)
- Merge node: combines both branches back into one stream (set to “Append” mode, 2 inputs)
- Wait node: pauses for 2 seconds
- (loop cycles back for the next 20 items)
The Merge node is set to 2 inputs (one from the true branch and one from the false branch). Make sure both branches are passing the same fields (for example, name and status) so the merged data is consistent. Mismatched fields will result in null values in your data.
With 91 items and a batch size of 20, the loop runs 5 times (4 full batches of 20 = 80 items, then 1 final batch of 11). The “done” branch confirms 91 items at the end, matching the input exactly.
The key rule: always merge all conditional branches back into a single stream before the Wait node. This applies whether you have 2 branches, 3 branches, or more. If the data going into the loop and the data coming out of the loop are not equal, your item counts will drift and cause bugs.
Join Our AI Community
Frequently Asked Questions
What is the difference between Loop Over Items and Split in Batches in n8n?
They are the same node. “Loop Over Items” is the display name shown in the n8n canvas, while “Split in Batches” is an alternate label shown in parentheses when you search for the node. Both refer to the same node that divides items into batches and processes them iteratively.
Do I always need a Wait node with the Loop Over Items node?
Not always, but almost always. The Loop Over Items node is primarily used for rate limiting, and rate limiting only works if you add a pause between batches. Without a Wait node, the loop runs as fast as possible and you will still hit rate limits. Add a Wait node after your processing step and configure the delay to match your API’s rate limit documentation.
Why does my n8n loop show the wrong item count on the Done branch?
This usually happens when conditional logic (an If node) inside the loop splits items into multiple branches that reconnect to the loop separately. Each branch adds its own item count, causing the total to balloon beyond the actual number of items. Fix it by adding a Merge node that combines all branches back into a single stream before the Wait node.
What batch size should I use in the n8n Loop Over Items node?
Check the rate limit documentation for the API you are calling. The batch size should match the maximum number of requests the API allows in your wait interval. For example, if the API allows 10 requests per second and you are waiting 1 second between batches, set your batch size to 10. Start conservative and increase if you are not hitting errors.
Can I use the Loop Over Items node for all repetitive tasks in n8n?
No. n8n automatically processes all input items through each node one at a time, so you do not need the Loop Over Items node for normal workflows. Use it only when you need to control the speed of processing due to rate limits or scraping restrictions. Adding it unnecessarily makes your workflow more complex without any benefit.
Next Steps
Now that you understand the n8n Loop Over Items node, here is how to put this into practice:
- Identify workflows that hit rate limit errors. Those are the ones that need the Loop Over Items node.
- Check the developer documentation for the API you are calling to find its exact rate limit.
- Use the batch size formula (Total Items / Batch Size = Loop Runs) to set up the right configuration.
- Add a Wait node after your processing step and before the loop continues.
- If you use conditional logic inside the loop, add a Merge node to recombine all branches before the Wait node.
- Verify the item count on the Done branch matches your input total to confirm the loop ran correctly.
If you are newer to n8n and want to understand how nodes and items work before diving into loops, check out our n8n beginner guide to get up to speed. Most workflows you build will not need the Loop Over Items node at all.
