Build an Automated Lead Generation Machine with Apify and n8n
What if you could automatically scrape thousands of local businesses from Google Maps, filter out the ones that are permanently closed, enrich each lead with AI-powered research, and drop everything into a Google Sheet — without writing a single line of code?
That’s exactly what we’re building in this tutorial. By combining the Apify community node for n8n with the Google Maps Scraper actor, you can create a fully automated lead generation pipeline that runs on demand and produces ready-to-use sales intelligence.
In this guide we’ll walk through every step: installing and connecting the Apify n8n node, selecting and configuring the Google Maps Scraper actor, building the 7-node workflow, and using an AI Agent with Perplexity to research each business before writing the results to Google Sheets.

What Is Apify?
Apify is a cloud-based web scraping and automation platform that hosts thousands of pre-built scraping tools called actors. Think of actors like apps in an app store — each one is designed to scrape or interact with a specific website or data source, and you can use them without writing any scraping code yourself.
The Apify marketplace currently hosts over 4,000 actors, covering everything from Google Maps and LinkedIn to Amazon, Instagram, and beyond. Actors are billed on a pay-per-event or pay-per-result basis, meaning you only pay for the data you actually collect.
For the Google Maps Scraper we use in this tutorial, pricing is per business result returned. A small scrape of 100–200 businesses typically costs just a few cents, making it extremely cost-effective for lead generation at scale.
To get started you’ll need a free Apify account at apify.com. Once signed up, you receive a monthly free credit allocation — more than enough to test everything in this tutorial.
Installing the Apify Community Node for n8n
Apify provides an official community node for n8n that gives you native access to all Apify actors directly inside your workflows. The node package is @apify/n8n-nodes-apify and it requires n8n version 1.57.0 or higher and Node.js 22.x or later.
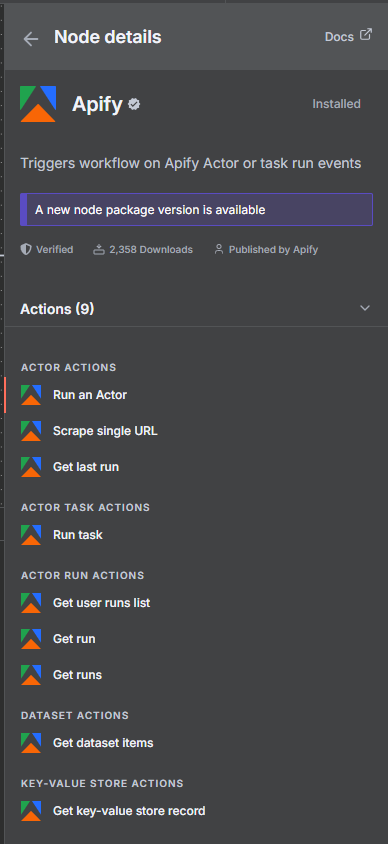
To install it in your self-hosted n8n instance, go to Settings → Community Nodes and search for @apify/n8n-nodes-apify. Click Install and n8n will download and register the node. After installation you’ll see three new node types available: Apify (for running actors and managing datasets), Apify Trigger (for reacting to actor completion events), and dedicated action nodes for common operations.
If you’re on n8n Cloud, community nodes are available directly in the node panel — search “Apify” and add them to any workflow.
Important: If you’re running an older version of n8n or Node.js, upgrade before installing. The Apify node uses modern async patterns that require the newer runtime.
Authenticating Apify in n8n: API Key and OAuth2
Before you can run any actors from n8n, you need to connect your Apify account. The Apify node now supports two authentication methods:
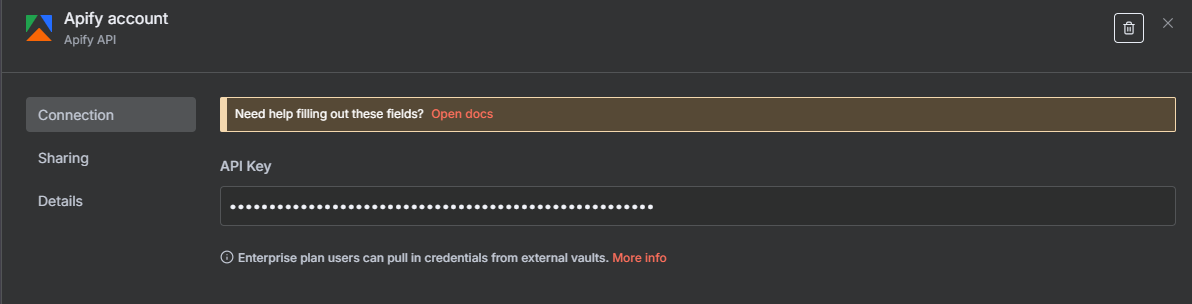
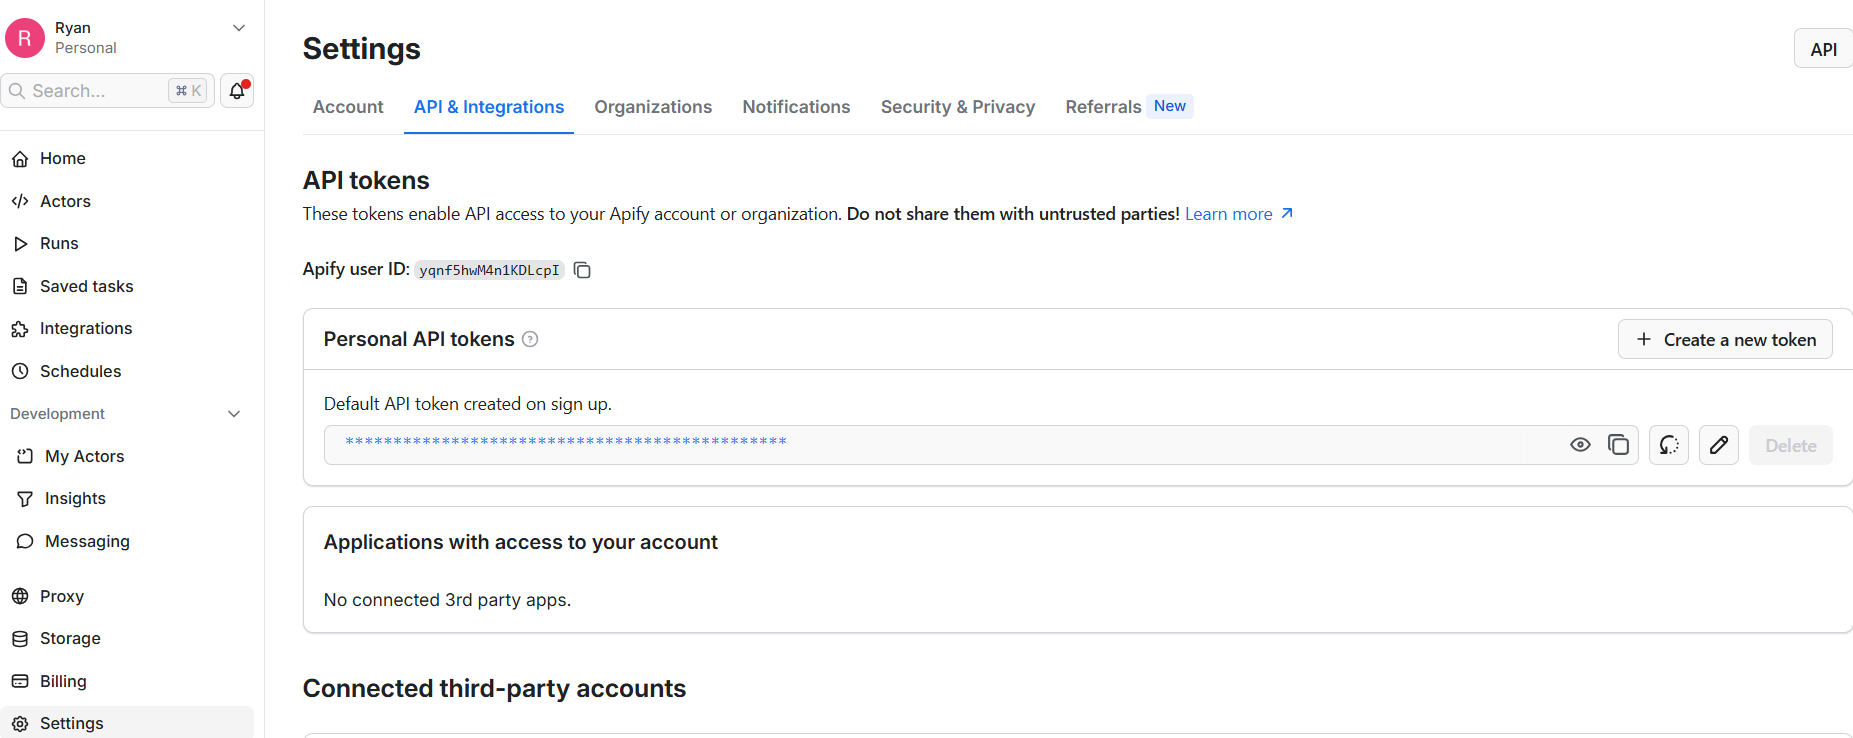
API Key (available on all plans): Go to your Apify account at Settings → API & Integrations and copy your Personal API Token. In n8n, create a new Apify credential, select “API Token” as the auth type, and paste it in. This is the most straightforward method and works on both self-hosted and cloud n8n.
OAuth2 (n8n Cloud only — new!): If you’re on n8n Cloud, you can now authenticate via OAuth2 instead of a manual API key. This creates a more secure, token-based connection that auto-refreshes without you needing to manage tokens manually. In the Apify credential dialog, select “OAuth2” and follow the authorization flow to connect your account.
For most self-hosted setups, the API Key method is the way to go. Either way, once the credential is saved you’re ready to start building workflows with any actor in the Apify marketplace.
The Google Maps Scraper Actor: What It Does and How It Works
The Google Maps Scraper is one of the most popular actors on the Apify platform, with a 4.3-star rating and hundreds of thousands of runs. It takes a search query and location, scrapes Google Maps, and returns structured data about every business it finds.
The actor accepts a JSON input configuration with these key fields:
- searchStringsArray — an array of search terms, e.g.
["plumbers in Chicago"] - maxCrawledPlacesPerSearch — how many results to return per search query (controls cost)
- language — the language for results, default:
en - exportPlaceUrls — whether to include direct Google Maps URLs for each result
- scrapeContacts — attempts to find email addresses and social profiles from each business’s website
The scrapeContacts option is particularly valuable for lead generation — it enriches each result with contact information scraped from the business’s own website, giving you emails, social media handles, and more without any extra steps.
Output fields include: business name, address, phone number, website, rating, number of reviews, business category, hours, coordinates, and (when scrapeContacts is enabled) email addresses, LinkedIn, Facebook, and other social profiles.
The Full 7-Node n8n Workflow
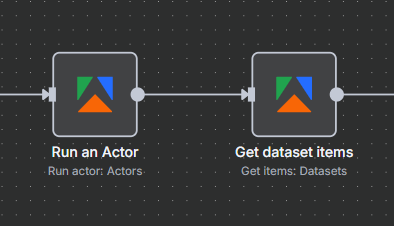
Our automated lead generation pipeline consists of seven nodes that work together to go from a search query all the way to a fully enriched Google Sheet:
- Form Trigger — starts the workflow when you submit a form with your search query and location
- Run Actor (Apify node) — launches the Google Maps Scraper actor with your inputs and waits for it to complete
- Get Dataset Items (Apify node) — retrieves all the scraped business records from the actor’s output dataset
- Filter — removes businesses that are permanently or temporarily closed
- Loop Over Items — processes each business record one at a time to avoid rate limits
- AI Agent — uses GPT-4o mini and a Perplexity search tool to research each business
- Google Sheets — writes each enriched record to a spreadsheet with all fields and the AI research summary
The result is a fully automated pipeline that runs on demand and produces a research-enriched list of leads — complete with contact info, ratings, and AI-generated context — ready for outreach.
Step 1: Setting Up the Form Trigger
The workflow starts with a Form Trigger node, which gives you a simple web form to kick off the scrape. Using a form trigger — instead of a manual trigger — means you can share the workflow URL with anyone on your team. They fill in the search query and hit submit, and the pipeline runs automatically.
Configure the Form Trigger with two fields:
- Search Query — a text field where you enter what you’re looking for, such as “plumbing companies in Austin TX” or “digital marketing agencies in London”
- Max Results — a number field to control how many businesses to scrape (and therefore how much the run costs)
The form outputs these values as {{ $json.searchQuery }} and {{ $json.maxResults }}, which you’ll reference in the Run Actor node. Once you activate the workflow, n8n provides a public form URL you can bookmark and reuse whenever you want to start a new scrape.
Step 2: Run Actor Node — Launching the Google Maps Scraper
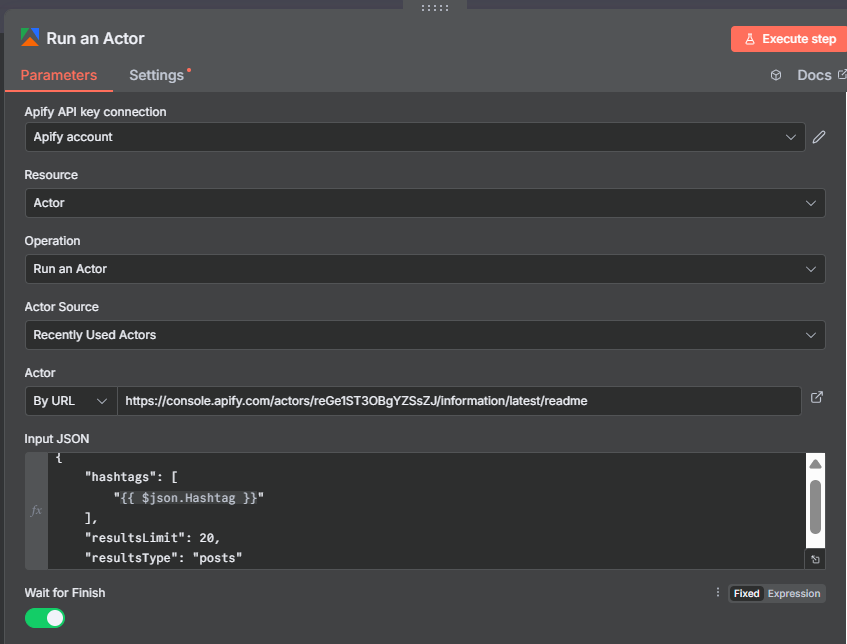
The Run Actor node is the heart of the workflow. This is where you tell n8n which Apify actor to launch and how to configure it.
In the node settings:
- Actor ID:
compass/crawler-google-places - Run Synchronously: Enable this so the node waits for the actor to finish before moving on
- Input: Provide the actor’s JSON configuration using expressions to inject the form values
The input JSON looks like this:
{
  "searchStringsArray": ["{{ $('Form Trigger').item.json.searchQuery }}"],
  "maxCrawledPlacesPerSearch": {{ $('Form Trigger').item.json.maxResults }},
  "language": "en",
  "exportPlaceUrls": true,
  "scrapeContacts": true
}
A typical run for 100 businesses takes 3–5 minutes depending on actor load. Once complete, the node output contains run metadata including the all-important defaultDatasetId you’ll need for the next step.
New convenience operation: The Apify node now includes “Run Actor and retrieve dataset items” — a single operation that combines steps 2 and 3. Useful for simpler workflows where you don’t need the filtering step between them.
Finding the Hidden Dataset ID
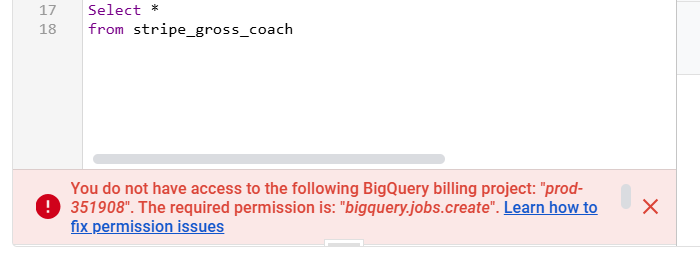
This is the step that trips up almost everyone building their first Apify workflow in n8n. After the Run Actor node completes, it returns a JSON object with run metadata. The scraped business data isn’t in this output directly — it’s stored in a separate dataset that you need to fetch with the Get Dataset Items node.
To connect the two nodes, you pass the defaultDatasetId from the Run Actor output to the Get Dataset Items node. Here’s how to find it:
- Run the workflow once with a small test query (10–20 results)
- Click the Run Actor node in the execution results panel
- Scroll down through the output JSON — the field you need is
defaultDatasetId - It looks something like:
"defaultDatasetId": "abc123xyz..." - In the Get Dataset Items node, set the Dataset ID to
{{ $json.defaultDatasetId }}
This is a common stumbling block because the output JSON is long and the dataset ID appears partway down. Once you’ve spotted it once, you’ll know exactly where to look on future runs.
Step 3: Get Dataset Items — Retrieving Your Scraped Data
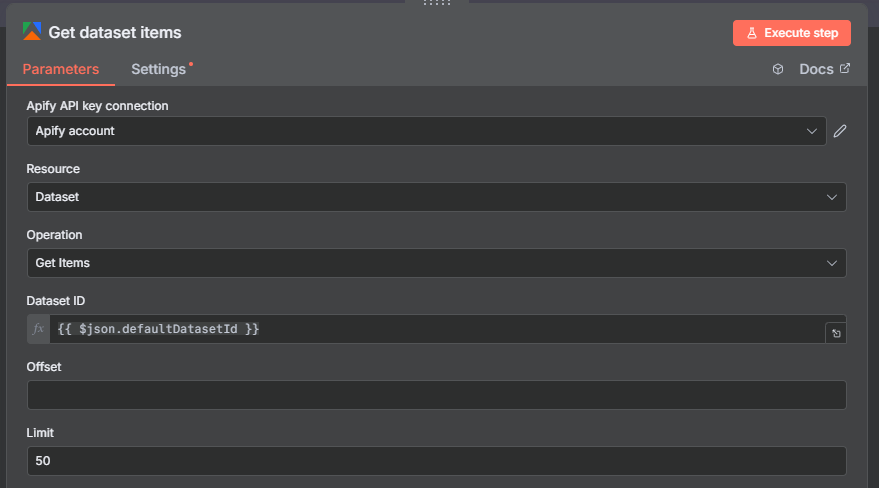
The Get Dataset Items node fetches all the records stored in the actor run’s output dataset. This is where the actual business data lives after the Google Maps Scraper finishes.
Configure the node with:
- Dataset ID:
{{ $json.defaultDatasetId }}— pulling the ID from the Run Actor output - Limit: Leave unset (or set it very high) to retrieve all records
- Format: JSON (default)
When the node runs, it returns one item per business — each containing all scraped fields: name, address, phone, website, rating, review count, category, hours, coordinates, and any contact info found by the scrapeContacts enrichment.
At this point in the workflow you have a raw list of businesses. Some will be permanently or temporarily closed — not useful leads. The Filter node handles removing those before you spend AI credits researching them.
Step 4: Filter Out Closed Businesses
Before sending businesses to the AI Agent, remove any that are no longer operating. The Google Maps Scraper returns a permanentlyClosed field and a temporarilyClosed field for each business — both are booleans.
Add a Filter node after Get Dataset Items and configure two conditions connected by AND logic:
- Condition 1:
{{ $json.permanentlyClosed }}equalsfalse - Condition 2:
{{ $json.temporarilyClosed }}equalsfalse
Any business where either field is true gets dropped from the pipeline automatically. This is important for two reasons: it improves the quality of your leads, and it saves money on AI API calls — you’re not paying to research a business that closed six months ago.
After filtering, the remaining items flow into the Loop Over Items node for per-business processing.
Step 5: Loop Over Items — Processing One Business at a Time
The Loop Over Items node (also called Split In Batches) processes each business record individually. This is necessary for two reasons:
First, the AI Agent node works on one item at a time — it needs to make a separate API call to research each business. Without the loop, n8n would attempt to process all records simultaneously, overwhelming the AI API and causing rate limit errors.
Second, the loop gives you better control over the Google Sheets write at the end. Processing records one at a time ensures each row lands in the spreadsheet cleanly without conflicts or duplicate entries.
Configure the Loop Over Items node with a Batch Size of 1. The node automatically iterates through every item from the Filter node, running the AI Agent and Google Sheets write for each business before moving to the next one.
Step 6: AI Agent Node — Enriching Each Lead with Research
This is where the workflow becomes genuinely powerful. For each business that passes the filter, an AI Agent node does contextual research using the business’s name, website, and other scraped data.
In the AI Agent node configuration:
- Agent Type: Conversational Agent
- Chat Model: GPT-4o mini or GPT-5 mini — these handle the research efficiently at very low cost
- Memory: No memory needed — each business is researched independently
- Tools: Add a Perplexity Search tool (configured in the next section)
The AI Agent’s job is to take raw business data from Google Maps and add a layer of intelligence: understanding what the company does, who their customers are, any recent news, and anything that would help you craft a relevant cold outreach message.
Because we’re using GPT-4o mini and a single Perplexity search call per business, the cost per lead is extremely low — typically well under $0.01 per business researched.
Configuring Perplexity as the AI Agent’s Research Tool
The AI Agent uses Perplexity as a real-time search tool to look up current information about each business. Unlike a static web search, Perplexity returns synthesized, up-to-date summaries — perfect for quickly understanding what a company does and whether they’re a good outreach prospect.
To add Perplexity as a tool in the AI Agent node:
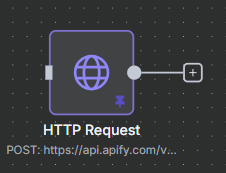
- Add a new tool and select “HTTP Request Tool”
- Connect it to the Perplexity API using your API key as a Bearer token
- Point it at the
https://api.perplexity.ai/chat/completionsendpoint - The AI Agent automatically calls this tool when it decides current information would help
The agent prompt tells the AI to research the company and return a brief summary. Here’s the kind of prompt that works well:
“You are a sales research assistant. Using the Perplexity tool, research the following business: [business name] located at [address] with website [website]. Return a 2–3 sentence summary of what the company does, who their ideal customers are, and anything noteworthy about their business that would help write a relevant cold outreach email.”
You get live, current information about each business — not just what Google Maps recorded, but what’s actually on their website and in recent coverage.
Step 7: Writing Enriched Leads to Google Sheets
The final node writes each enriched business record to a Google Sheet. Connect your Google account to the Google Sheets node and point it at a target spreadsheet.
Set the operation to Append or Update Row and map these fields to your sheet columns:
- Business Name:
{{ $json.title }} - Address:
{{ $json.address }} - Phone:
{{ $json.phone }} - Website:
{{ $json.website }} - Email:
{{ $json.email }}(from scrapeContacts enrichment) - Rating:
{{ $json.totalScore }} - Reviews:
{{ $json.reviewsCount }} - Category:
{{ $json.categoryName }} - LinkedIn:
{{ $json.linkedInUrl }} - Facebook:
{{ $json.facebookUrl }} - Google Maps URL:
{{ $json.url }} - AI Research Summary:
{{ $json.output }}(from the AI Agent)
Each time a business completes its loop iteration, a new row is appended to the sheet. By the time the workflow finishes, you have a complete, research-enriched lead list ready for outreach.
The Final Results: What Your Lead Sheet Looks Like
After the workflow completes, your Google Sheet contains a row for every active business that matched your search query. Each row includes all the raw data from Google Maps — name, address, phone, website, rating, reviews, category — plus any contact information found by the scrapeContacts enrichment, and finally the AI research summary generated by the agent.
The AI research summary is where this workflow really shines. Instead of just having a phone number and address, you now have a paragraph for each business explaining what they do, who their customers are, and what makes them a relevant prospect. That context is invaluable when writing cold emails at scale — your outreach can reference specific details about each business rather than sending a generic template.
For a search of 100 businesses, expect 70–80 active businesses in the final sheet after filtering closed ones. The full workflow runs in approximately 15–20 minutes end to end, including AI research time. Total cost for a 100-business run: roughly $0.50–$2 in Apify credits plus a few cents in AI API costs — far cheaper than any manual research process.
What’s New in the Apify n8n Node (2024–2025)
The Apify community node has seen significant updates that make it more powerful and easier to use. Here’s what’s new if you’re upgrading from an older version:
OAuth2 Authentication (new): In addition to API key auth, the node now supports OAuth2 for n8n Cloud users. This provides a more secure, managed authentication flow that automatically refreshes tokens — no more manually rotating API keys.
New Operations:
- Scrape Single URL — a new operation that lets you scrape a single web page without configuring a full actor run. Great for quick data extractions mid-workflow, such as pulling the content of a web page to pass to an AI node.
- Run Actor and Retrieve Dataset Items — combines the Run Actor and Get Dataset Items steps into a single node. Perfect for simpler workflows where you don’t need filtering between the two operations.
Apify Trigger Node (new): A dedicated trigger that fires when an Apify actor or task completes. Instead of polling for results, your n8n workflow wakes up automatically when the actor finishes. Ideal for long-running scraping jobs that you schedule on Apify’s platform.
System Requirements: The latest version requires n8n 1.57.0+ and Node.js 22.x or later. If you’re on an older setup, verify compatibility before upgrading.
Use Cases Beyond Google Maps Lead Generation
The Google Maps Scraper is a great entry point, but the Apify n8n node unlocks hundreds of other data sources. Here are some other powerful use cases you can build with the same workflow pattern:
LinkedIn Company Scraper: Pull a list of companies from LinkedIn based on industry, size, and location — then enrich each one with AI research for targeted B2B outreach.
Product Price Monitoring: Use an e-commerce scraper actor to monitor competitor prices on Amazon or Shopify. Trigger n8n workflows when prices change — send alerts, update your own pricing, or log changes to a spreadsheet.
Job Board Aggregation: Scrape multiple job boards for listings that match certain criteria, deduplicate them, and route relevant opportunities to Slack or email.
Review Monitoring: Use a Google Reviews scraper to monitor new reviews for your clients’ businesses, run sentiment analysis, and alert your team when a negative review appears.
Content Research Pipeline: Use the new Scrape Single URL operation to pull content from any URL mid-workflow — summarize articles, extract key points, or feed content into an AI writing pipeline without needing a separate actor setup.
The core pattern is always the same: pick the right Apify actor for the data source, configure the inputs, retrieve the dataset items, and use n8n’s processing nodes to transform and route the data wherever you need it.
Tips, Tricks, and Common Issues
Start small to control costs. When testing, set maxCrawledPlacesPerSearch to 10 or 20. Once you’re confident the workflow is working correctly, scale up. A misconfigured workflow running 1,000-result scrapes can burn through Apify credits quickly.
The missing dataset ID. If Get Dataset Items returns empty results, double-check that you’re referencing $json.defaultDatasetId correctly and that Run Actor is passing its output forward. Run the workflow step by step in test mode to verify the data flow at each stage.
Actor timeouts. Large scraping jobs can exceed n8n’s default timeout window. In the Run Actor node, increase the timeout setting. Alternatively, use the Apify Trigger node so the workflow doesn’t block while waiting for the actor — it simply wakes up when the job is done.
AI rate limits. If you’re researching a large list, the AI Agent can hit OpenAI rate limits. Add a Wait node inside the loop (1–2 seconds) to throttle requests. For very large lists, consider using a higher-tier API plan or batching the AI calls.
Missing contact data. The scrapeContacts option doesn’t always find emails — some businesses don’t publish contact details anywhere online. Expect emails for roughly 40–60% of businesses, which is still a significant enrichment over raw Google Maps data.
Google Sheets setup. Make sure your Google Sheets credential has edit access to the target spreadsheet and that the spreadsheet already has the correct column headers in row 1 before the first workflow run.
