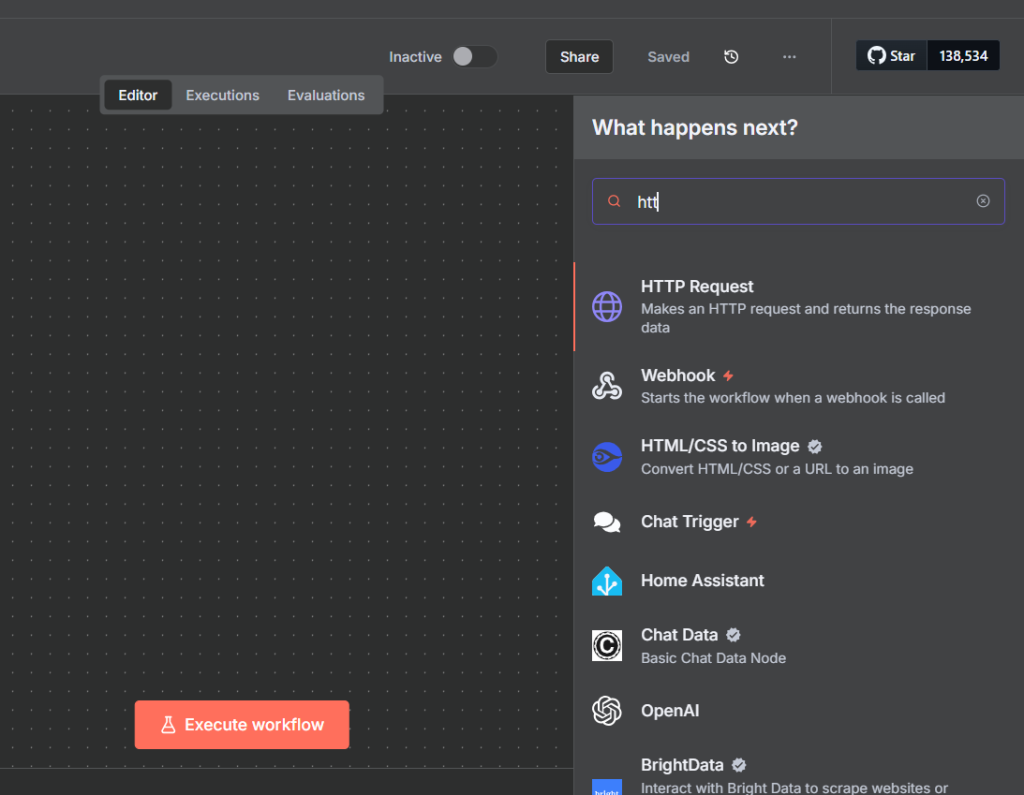
n8n HTTP Request Node: Complete Step-by-Step Guide
The n8n HTTP Request node is one of the most powerful — and most used — nodes in the entire n8n ecosystem. If a native n8n integration doesn’t exist for the app you want to connect, or if the built-in node is missing an endpoint you need, the HTTP Request node is how you fill that gap. In this guide you’ll learn exactly how to configure it, walk through real examples using SerpAPI and Appify, and see how to secure your credentials properly.
Whether you’re just getting started with automation or already building complex AI workflows, mastering the HTTP Request node will unlock nearly any API on the internet for use inside n8n.
What Is the n8n HTTP Request Node?
The HTTP Request node lets you send HTTP requests to any external API or web service directly from an n8n workflow. Think of it as a universal connector — if a service has a REST API, you can talk to it from n8n using this node.
You’ll reach for this node in two main situations. First, when the app you want to connect to has no native n8n integration. Second, when a native integration does exist but doesn’t expose all of the endpoints you need. Many popular apps have hundreds of API endpoints, and native nodes only cover the most common ones.
If you’re new to n8n, check out our n8n beginner guide before diving in here.
HTTP Methods: GET, POST, PUT, PATCH, and DELETE
Every HTTP request uses a method that tells the server what action you want to perform. There are five methods you’ll use regularly in n8n.
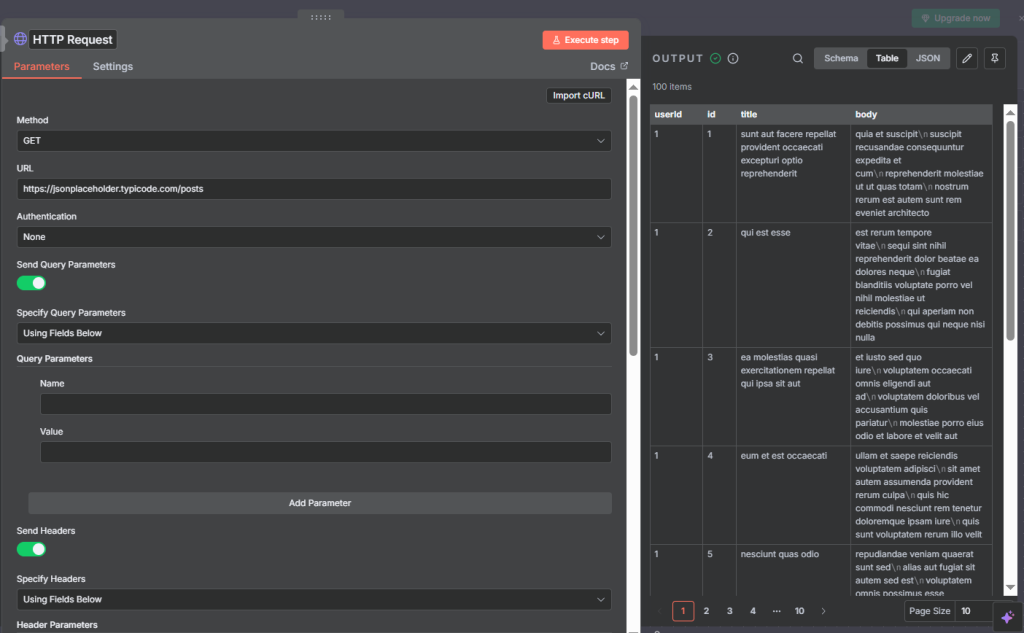
GET is for reading or receiving data. Use it when you want to pull information from a service — search results, records, reports. It’s the most common method and never modifies anything on the server.
POST creates something new. When you submit a form, add a row to a database, or kick off a scraping job, you’re usually sending a POST request with data in the request body.
PUT and PATCH both update existing records, but with a subtle difference. PUT replaces the entire resource; PATCH updates only the fields you specify. In practice, read the API documentation — it will tell you which one to use.
DELETE removes a record. Use it carefully — most APIs don’t provide an undo for DELETE requests.
How to Configure the HTTP Request Node
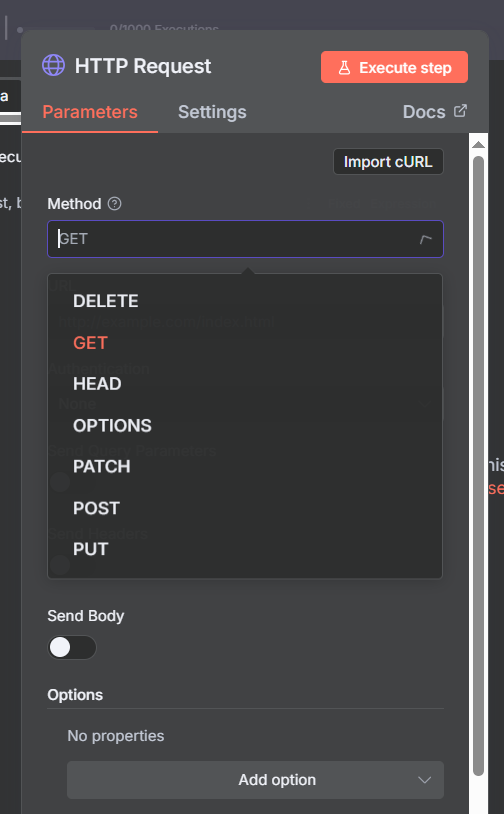
Once you drag the HTTP Request node into your workflow, you’ll see four main configuration areas: Method, URL, Authentication, and the tabbed section for Parameters, Headers, and Body.
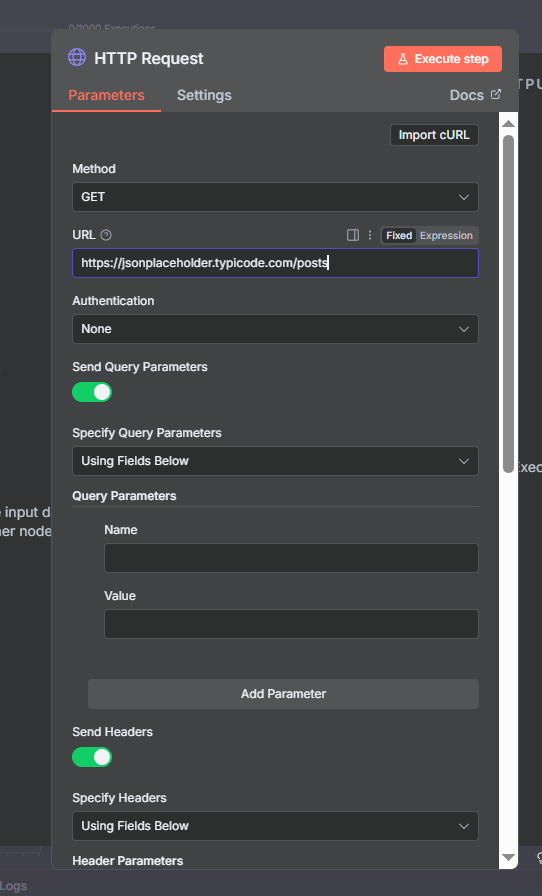
Method and URL
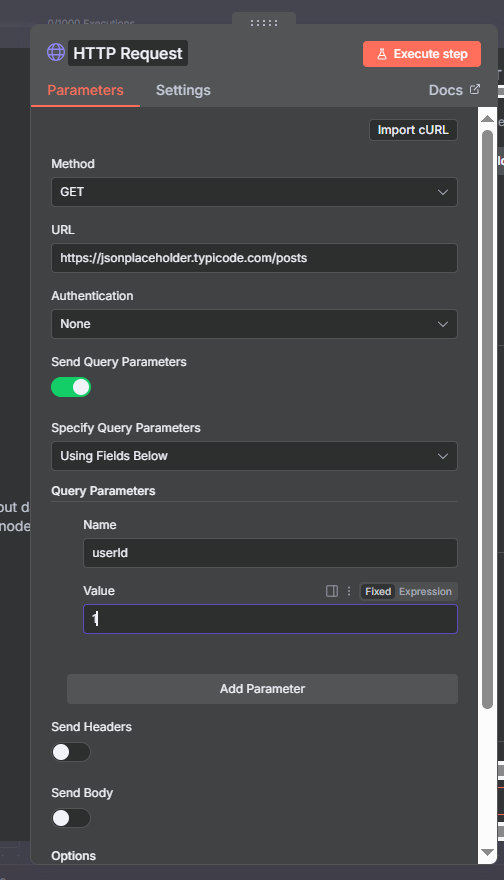
Start by selecting the Method — GET, POST, PUT, PATCH, or DELETE. Then paste the API endpoint URL. The base URL always comes from the API documentation. Dynamic values (like a search term or record ID) can be injected using n8n expressions: just click the expression icon next to any field and reference data from earlier nodes.
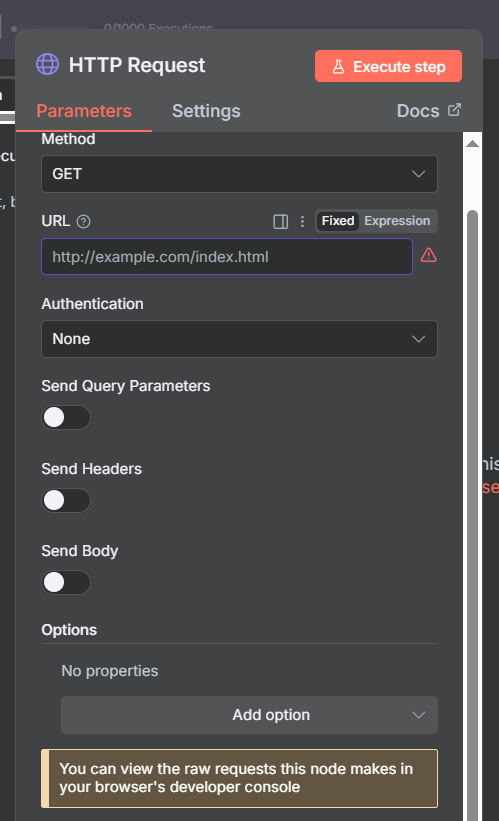
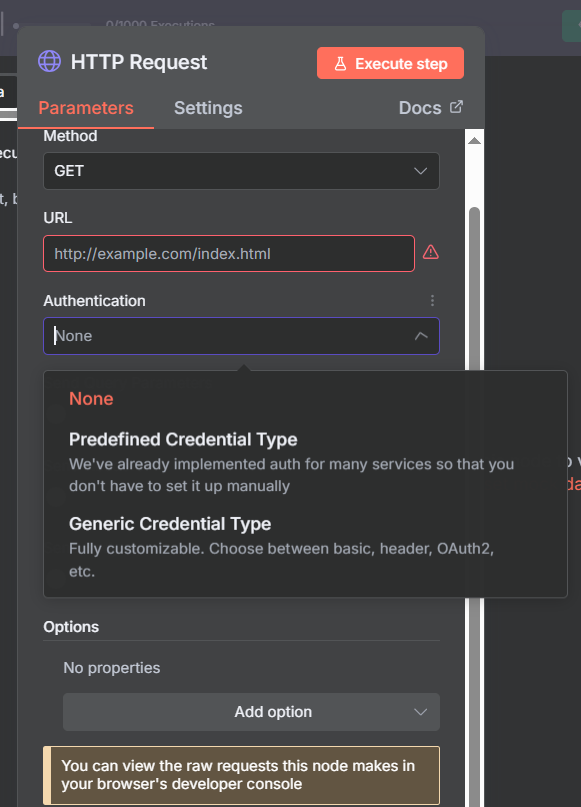
Authentication
The Authentication section is where you connect your API credentials. n8n offers two approaches: Predefined Credential Type and Generic Credential Type.
Predefined credentials cover the most popular services — SerpAPI, AirTable, Appify, and many others. When you choose a predefined type, n8n knows exactly how to attach your API key so you don’t have to configure it manually.
Generic credentials give you full control. The four generic options are: Basic Auth (username + password), Bearer Token (most common for modern APIs), Header Auth (custom header name and value), and Query Auth (API key attached as a URL query parameter). If a predefined type exists for your API, always use it — it’s faster and less error-prone.
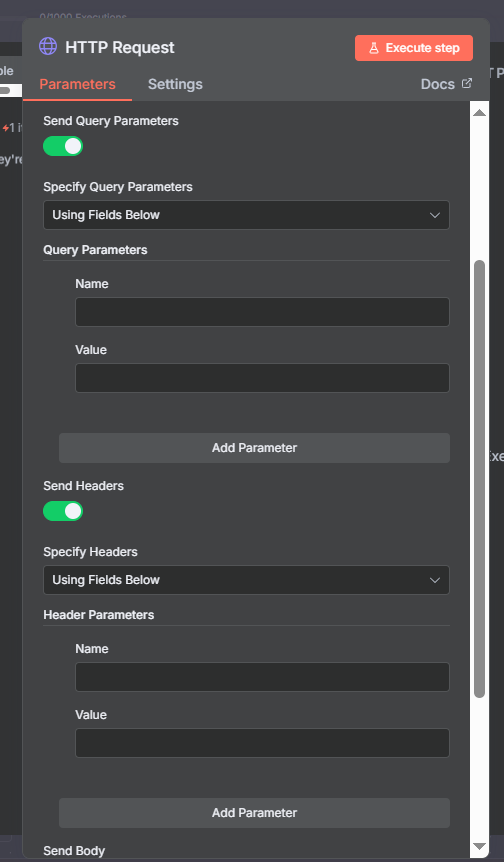
Query Parameters and Headers
Query Parameters are key-value pairs that get appended to the URL after a question mark (e.g. ?q=n8n&location=US). They’re typically used for filters, search terms, and optional settings in GET requests. The API documentation will list all available parameters.
Headers contain metadata about the request — like the Content-Type or custom authorization tokens. Most of the time authentication is handled automatically through the Authentication section, but occasionally an API requires you to set a specific header manually.
Request Body
The Body is where you send data to the server in POST, PUT, or PATCH requests. n8n gives you two formats: “Using Fields Below” (key-value pairs you fill in manually) and “JSON” (paste or build a full JSON object). For complex nested data, JSON mode is easier.

Using cURL Import to Speed Up Setup
One of the most useful features in the HTTP Request node is cURL import. Most API documentation includes example cURL commands — those long terminal commands that start with “curl”. Instead of manually translating every parameter into the n8n interface, you can paste the cURL command directly into n8n and it will auto-fill the Method, URL, headers, and body for you.
To use it, click the three-dot menu inside the HTTP Request node and select “Import cURL”. Paste the example cURL from the API docs and click Import. n8n typically fills in 80–90% of the configuration automatically. You’ll usually just need to swap in your actual credentials afterward.
This shortcut alone can save you 10–15 minutes whenever you’re configuring a new API endpoint for the first time.
Join Our AI Community
How to Find API Documentation
Before you can configure the HTTP Request node, you need to know what the API expects. Finding the right documentation is a skill in itself.
The easiest approach is to Google “[app name] API docs”. Most companies also publish their developer documentation at a /developers URL — for example, developers.google.com or developer.twitter.com. If you can’t find the docs quickly, ask Perplexity AI: it’s excellent at surfacing API documentation and can often explain the endpoint structure you need.
Once you find the docs, look for the endpoint list. Each endpoint will show you the method, the URL structure, required vs. optional parameters, expected headers, and example responses. The example response is especially valuable — it tells you the exact JSON keys you’ll be working with in downstream nodes.
Example 1: GET Request with SerpAPI
SerpAPI lets you pull Google search results programmatically. This is a classic GET request with query parameters — no body required.
Set the Method to GET and the URL to https://serpapi.com/search. In the Authentication section, select “SerpAPI” from the predefined list and connect your API key credentials. Then add your query parameters: “q” for the search term, “location” for a geography (optional), and “num” for the number of results.
When the node runs, you’ll get a structured JSON response containing organic_results, ads, related_questions, and more. From there you can pass the data to a downstream node — for example, into an AI agent to summarize the search results, or into a Google Sheet to log them.
Example 2: POST + GET with Appify (Instagram Scraper)
Appify is a web scraping platform. This example shows how many APIs work in two steps: a POST to kick off a job, and a GET to retrieve the results once the job is done.
Step 1 — POST to start the scrape: Set Method to POST and use the Appify actor run endpoint. In the Authentication section, choose the Appify predefined credential type and connect your API token. The body is JSON, and you pass in the target URLs or usernames you want to scrape. For example: {"startUrls":[{"url":"https://www.instagram.com/nasa/"}]}.
Step 2 — GET to retrieve results: After the POST kicks off the actor run, Appify returns a run ID. Use that run ID in a second HTTP Request node set to GET, hitting the dataset endpoint. You can wait for the run to complete using n8n’s Wait node, or simply add a delay if the job typically finishes quickly.
This two-step POST + GET pattern is common across many scraping and async processing APIs. Once you’ve done it once, you’ll recognize the pattern instantly in new APIs.
API Key Security: Always Use n8n Credentials
Never paste an API key directly into the URL field or as a hardcoded value inside a node. If you share a workflow, export it, or commit it to version control, your API key will be exposed in plain text.
The correct approach is to store the API key in n8n’s credential system (Settings → Credentials) and reference it in the Authentication section of the HTTP Request node. Credentials are encrypted at rest, excluded from workflow exports by default, and can be rotated in one place without updating every node that uses them.
One important note for AirTable users: as of February 2025, AirTable deprecated their old API key system in favor of Personal Access Tokens. If you’re using an old AirTable credential in n8n, you’ll need to create a new Personal Access Token in your AirTable account settings and update your n8n credential accordingly.

Using the HTTP Request Node as an AI Agent Tool
The HTTP Request node can be attached directly to an n8n AI agent as a tool. This means your AI agent can call external APIs on demand — searching the web, pulling live data, or triggering actions — based on the conversation context.
To use the HTTP Request node as an agent tool, add it to the Tools section of your AI Agent node. You’ll need to give it a clear name and description so the LLM knows when to call it. For example: name “search_google”, description “Use this tool to search Google and return organic results. Input: search query string.”
This pattern is especially powerful for building research agents, competitive intelligence tools, and dynamic report generators that need live data rather than static context.
Common HTTP Request Errors and How to Fix Them
Two categories of errors will account for the vast majority of issues you encounter: 400-level errors (client errors) and 500-level errors (server errors).
400 Bad Request means the server understood your request but rejected it because of something you sent. Common causes: a missing required parameter, a malformed JSON body, or an invalid field value. Check the API docs against your node configuration carefully.
401 Unauthorized and 403 Forbidden both indicate authentication problems. 401 means no credentials were provided or they’re invalid; 403 means the credentials are valid but don’t have permission for that endpoint.
404 Not Found means the URL doesn’t exist. Double-check the endpoint path — a missing slash or a typo in the URL is often the culprit.
422 Unprocessable Entity means the server understands the request but can’t process it — usually a validation error in the body data.
500-level errors come from the server, not your workflow. 503 Service Unavailable usually means the API is down or rate-limiting you. For rate limiting, use the Loop Over Items node to batch requests and add a Wait node between batches.
A useful debugging tip: pin test data in n8n so you’re not hitting the API on every run during development. Right-click the output of any node and select “Pin Data” — this freezes that node’s output and prevents downstream nodes from making real API calls when you test them.
Join Our AI Community
Frequently Asked Questions
What is the difference between query parameters and headers?
Query parameters are appended to the URL and are visible in the request address. They’re typically used for filters and optional settings. Headers travel with the request but are not visible in the URL — they usually carry authentication tokens, content type declarations, and other metadata.
When should I use “Using Fields Below” vs. JSON for the request body?
Use “Fields Below” when you have a small number of simple key-value pairs. Use JSON when you need nested objects or arrays, or when you’re copying a JSON example directly from the API docs.
Can I use the HTTP Request node to download files or images?
Yes. Set the Method to GET with the file URL. In the node options, enable “Response Format” and set it to “File”. n8n will pass the binary file data to the next node. See our n8n Binary Data guide for more detail.
What should I do if the API doesn’t have a native n8n node?
Use the HTTP Request node. Find the API’s documentation, identify the endpoint you need, set the method and URL, configure authentication, and add any required parameters. The cURL import shortcut can get you started in under a minute if the docs include example cURL commands.
How do I handle rate limiting?
Use the Loop Over Items node to process records in batches, and add a Wait node between batches to pause execution. Most APIs specify their rate limits in the documentation. Divide your total records by the batch size and calculate the required pause accordingly.
Next Steps
The HTTP Request node becomes even more powerful when combined with other n8n nodes. Here are some directions to explore next:
- Connect the HTTP Request node to the n8n AI Agent to give your agent real-time data access from any API.
- Use the n8n Webhook node to receive incoming HTTP requests and trigger workflows — the reverse of what HTTP Request does.
- Learn how to work with binary data (images, PDFs, files) using our n8n Binary Data guide.
- Handle large datasets by pairing HTTP Request with the Loop Over Items node for rate-limit-safe batch processing.
