n8n HubSpot Integration: Update Contacts One at a Time or in Bulk
Need to update HubSpot contacts from n8n? You have two very different options — and choosing the wrong one can cost you hours. In this guide, we walk through both approaches: the built-in HubSpot node for simple, small-scale updates, and the HubSpot API via HTTP Request for bulk updates of 100 contacts every 10 seconds.
This is based on a real client project where we needed to sync 25,000 HubSpot contacts from a database every single day. Here’s exactly how we solved it.
What This Guide Covers
This tutorial covers two complete n8n workflows for updating HubSpot contact properties — one using the native HubSpot node, and one using the HubSpot API directly with an HTTP Request node. You’ll learn how authentication works for each approach, when to use each method, and the key differences in how HubSpot identifies contacts depending on which route you take.
By the end, you’ll be able to choose the right approach for your scale and set it up confidently in n8n — whether you’re updating 10 contacts or 25,000.
Two Ways to Authenticate with HubSpot in n8n
Before you build anything, you need to know about the two completely different authentication methods for HubSpot in n8n. They’re not interchangeable — each belongs to a specific workflow approach:
OAuth via Google Login: This works with n8n’s built-in HubSpot node. You simply connect your Google account tied to your HubSpot account and you’re done. It’s the easiest setup, but it only supports one-at-a-time contact operations.
Private App Token: This is required if you want to use the HubSpot API directly via an HTTP Request node for bulk operations. HubSpot deprecated their legacy API key, so you must create a private app to generate an access token. More on that setup below.
The most important thing: don’t try to use OAuth credentials in an HTTP Request node — it won’t work. Match the credential type to the workflow approach.
Solution 1: The Built-in HubSpot Node (One at a Time)
The built-in HubSpot node in n8n makes updating a contact dead simple. Once you authenticate via Google OAuth, you can use the Contact → Update operation. You pass in the contact’s email address as the lookup key, then specify the properties you want to change.
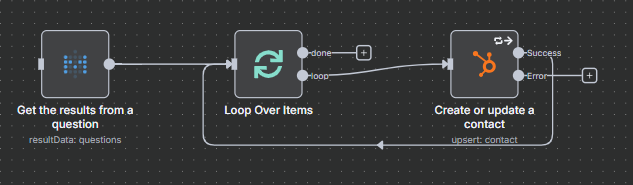
This is great for lightweight automation — things like updating a contact’s lead status after a form submission, or syncing a small batch of records from a spreadsheet. The flow looks like this:
Trigger → (Get your data) → HubSpot node (Contact → Update) → Done
One important limitation: the built-in HubSpot node uses email as the primary key. Make sure your source data includes the contact’s email address. You cannot look up or update by HubSpot contact ID using this node.
Using Loop Over Items for Multiple Contacts
If you have more than one contact to update, you’ll need a Loop Over Items node before the HubSpot node. This processes your data records one row at a time, passing each one through the HubSpot update operation.
Inside the loop, we recommend these node settings to handle failures gracefully:
- Retry on fail: Enabled, max retries 2
- Time between retries: 1,000ms
- Continue on error output: Enabled
After each contact is updated, the loop automatically pulls the next row and continues. This is reliable for smaller datasets — but if you’re looking at thousands of contacts, this one-at-a-time approach will take a long time and rack up API calls.
Join Our AI Community
When the Built-in Node Falls Short
For our client project, we needed to update 25,000 HubSpot contacts every day. Running those one-at-a-time through the built-in node would have taken hours — and the API cost would have been unsustainable. That’s when we switched to the HubSpot Batch Update API.
The HubSpot API lets you update up to 100 contacts per batch, with a rate limit of approximately 100 updates per 10 seconds. That means 25,000 contacts can be processed in roughly 250 API calls instead of 25,000. The difference in speed and reliability is dramatic.
If you’re working with more than a few hundred contacts, or if this workflow runs on a daily schedule, the API approach is the right call.
Solution 2: Bulk Update via the HubSpot API
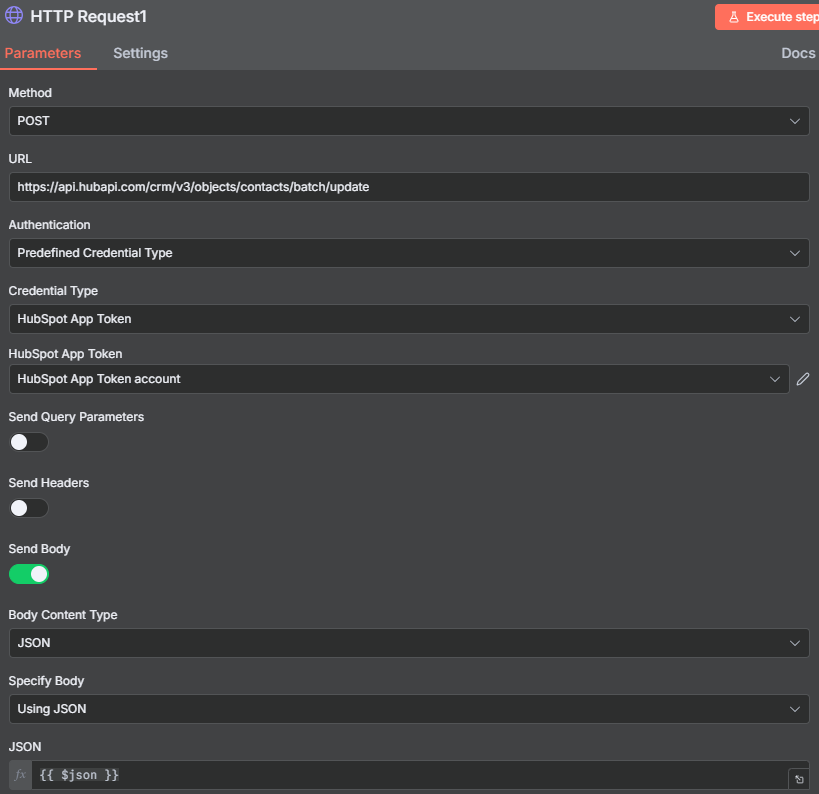
The bulk update workflow replaces the built-in HubSpot node with an HTTP Request node that calls the HubSpot batch update endpoint directly:
POST https://api.hubapi.com/crm/v3/objects/contacts/batch/updateThis endpoint accepts an array of up to 100 contact objects, each identified by their HubSpot contact ID (not email). Your request body looks like this:
{
  "inputs": [
    {
      "id": "123456789",
      "properties": {
        "your_property": "new_value",
        "another_property": "updated_value"
      }
    },
    {
      "id": "987654321",
      "properties": {
        "your_property": "new_value"
      }
    }
  ]
}
You build this JSON payload in a Code node before the HTTP Request. The Code node grabs the 100 rows from the current batch, formats them into this structure, and passes the result to the HTTP node.
Creating a HubSpot Private App
To call the HubSpot API from n8n, you need to create a Private App in HubSpot. This replaces the old API key method, which HubSpot has deprecated. Here’s the exact path:
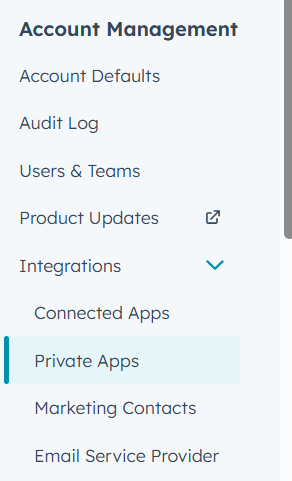
- In your HubSpot account, click the Settings icon in the top navigation bar
- In the left sidebar, navigate to Integrations → Private Apps
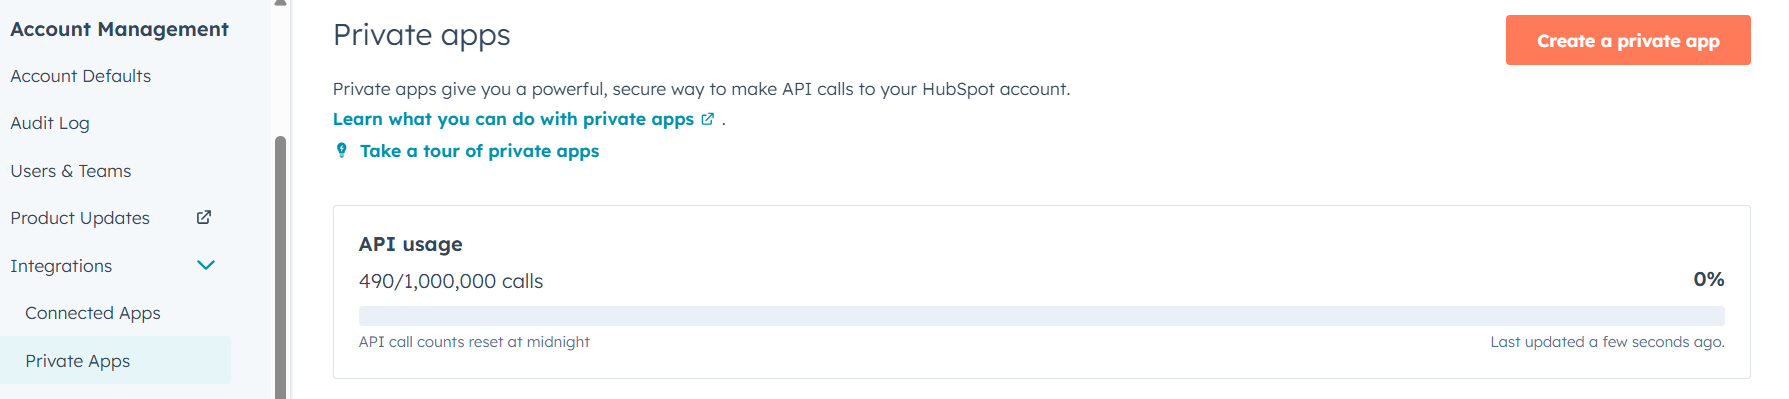
- Click Create a private app
- Give it a name (e.g. “n8n Integration”)
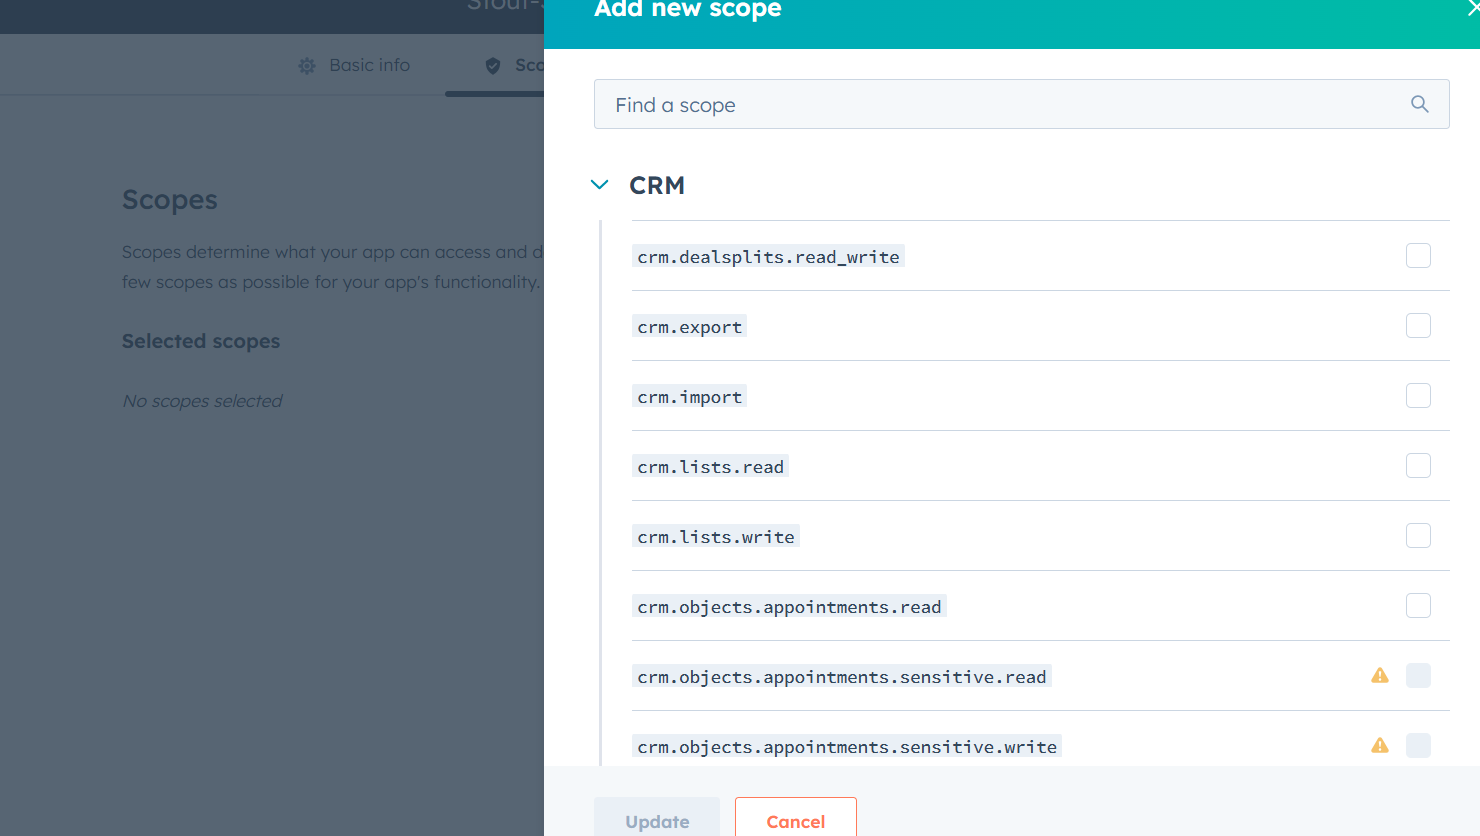
- Go to the Scopes tab and add the required scopes
- Click Create app
- Copy the Access Token shown after creation
That access token goes into your n8n HTTP Request node as the App Token under Generic Credential Type → API Key. Test the connection before building the rest of your workflow.

Adding the Required Scopes for Contact Updates
Getting the scopes right is the step that trips most people up. The n8n HubSpot credentials documentation has an exact list of required scopes — use that as your reference. You’ll need at minimum:
crm.objects.contacts.readcrm.objects.contacts.write
When adding scopes in HubSpot, use the Add new scope search box and paste each scope name to find and check it. Don’t try to type them manually — the search makes it much faster. Once you’ve selected all required scopes, save the app and grab your access token.
If your API calls return 403 errors after setup, missing scopes are almost always the cause. Go back to your private app settings, add the missing scope, and your existing token will automatically update — no need to regenerate it.
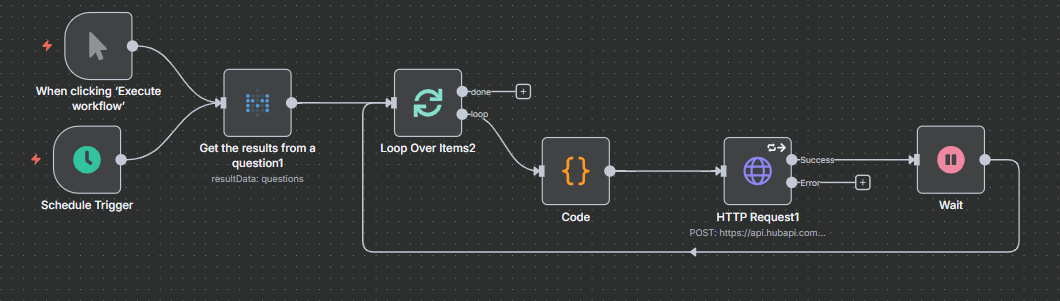
Building the Full Bulk Update Workflow
Here’s the complete node structure for the bulk update workflow:
- Trigger — Manual or Schedule (for daily runs)
- Data source — Fetch your records (SQL query via Metabase, Google Sheets, database node, etc.)
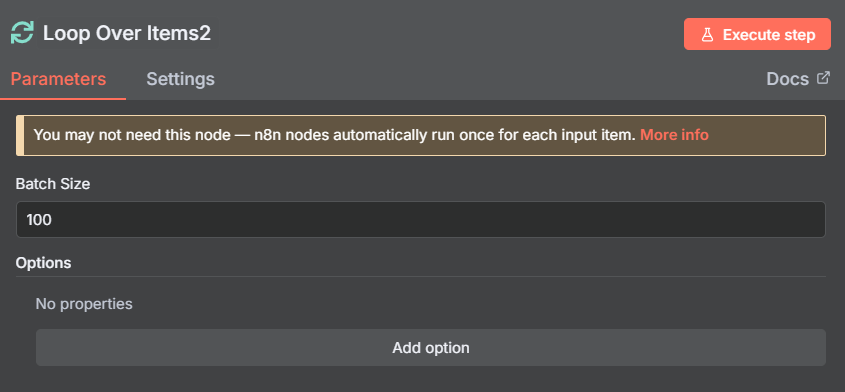
- Loop Over Items — Set batch size to 100 (matches the HubSpot rate limit)
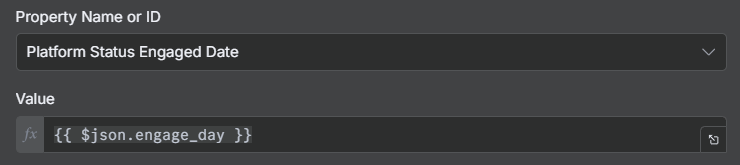
- Code node — Format the batch into the HubSpot JSON structure (see example above). Also handle any date-to-timestamp conversions HubSpot requires for date properties
- HTTP Request node — POST to the batch update endpoint with your app token
- Wait node — Add a 2-second pause to respect rate limits and give the API time to process
The loop runs 250 times for 25,000 contacts — each pass sends 100 records and waits 2 seconds before the next batch. Total runtime is well under 15 minutes.
Set the HTTP Request node with Retry on fail enabled (max 2 retries, 1,000ms between) so transient API errors don’t kill the whole run.
Rate Limits and the Critical ID Difference
Two things catch people off guard when switching from the built-in node to the API approach:
Rate limits: HubSpot’s batch update endpoint allows approximately 100 contacts per 10 seconds. The Wait node in your workflow handles this — a 2-second pause after each batch is sufficient. Note that rate limits can vary depending on your HubSpot plan tier.
Contact ID vs Email: This is the biggest difference between the two solutions. The built-in HubSpot node uses email address as the contact identifier. The HubSpot API uses the internal HubSpot contact ID. If you’re switching from the built-in node to the API, you’ll need to update your data source query to include the HubSpot contact ID field. Make sure you include this in your SQL query or data pull before building the rest of the workflow.
Built-in HubSpot Node vs HTTP Request: Key Differences
Authentication: The built-in node uses OAuth (Google login). The HTTP Request approach requires a Private App token.
Contact identifier: Built-in node uses email. HTTP Request uses HubSpot contact ID.
Throughput: Built-in node processes one contact at a time. HTTP Request handles 100 per batch.
Best for: Use the built-in node when you have fewer than a few hundred contacts or need a quick setup. Use the HTTP Request approach when you have 1,000+ contacts, run the workflow on a schedule, or need the process to complete quickly.
Complexity: The built-in node is beginner-friendly. The HTTP Request approach requires a Code node for JSON formatting and a bit more setup, but it’s far more scalable.
Join Our AI Community
Frequently Asked Questions
Can I use the HubSpot node to update contacts in bulk?
No — the built-in HubSpot node in n8n processes one contact at a time. For bulk updates, you need to use an HTTP Request node calling the HubSpot batch update API endpoint at api.hubapi.com/crm/v3/objects/contacts/batch/update.
Why did my HubSpot API key stop working in n8n?
HubSpot deprecated their legacy API key authentication. You need to create a Private App in HubSpot (Settings → Integrations → Private Apps) and use the generated access token instead. The old developer API key method no longer works reliably.
What’s the HubSpot batch update rate limit?
The batch update endpoint allows approximately 100 contact updates per 10 seconds. Set your Loop Over Items batch size to 100 and add a Wait node (2 seconds) after each HTTP Request to stay within the limit. Rate limits may vary by HubSpot plan.
Can I bulk update companies or deals the same way?
Yes — the same approach works for companies and deals with different endpoint URLs. Replace contacts with companies or deals in the API path, and check the HubSpot API docs for any differences in the request format or rate limits.
Do I need different scopes for updating vs reading contacts?
Yes. For updating contacts you need crm.objects.contacts.write, and for reading you need crm.objects.contacts.read. Add both when setting up your Private App scopes to avoid permission errors.
Next Steps
Now that you know how to update HubSpot contacts in n8n — both one-at-a-time and in bulk — here are some related guides to take your n8n skills further:
- n8n HTTP Request Node: Complete Guide — Everything you need to know about calling APIs from n8n, including authentication methods and handling responses
- n8n Loop Over Items Node — How to process large datasets in batches efficiently
- n8n Code Node Guide — Writing JavaScript and Python in n8n to transform and format data
- n8n Aggregate Node — Combine multiple items into one before sending to an API
If you’re building out HubSpot automations for a client or your own business and want help with the setup, we’re available for custom n8n projects. Reach out through the link below.
