Connect Google Drive to N8N
Setting up your Google Drive connection to N8N has to be one of the first things you need to do when starting to explore the software.
Google Drive is used a ton within workflows and can really expand your possibilities of builds. In this lesson, I’ll take you step by step to getting this ready to go. If you want to watch a video, I have one linked below from our YouTube channel. We have a lot of other AI and N8N content on there as well so check it out.
If you need help with any N8N workflows or data for your business I’m taking on customers
If you are brand new to N8N you can sign up here
Setting up Google Drive for N8N
There are a few ways in which we can set up the Google Drive connection. We are going to set it up by inserting a google drive node.
In the top right, click the + icon. Search for Google Drive and then click download a file.
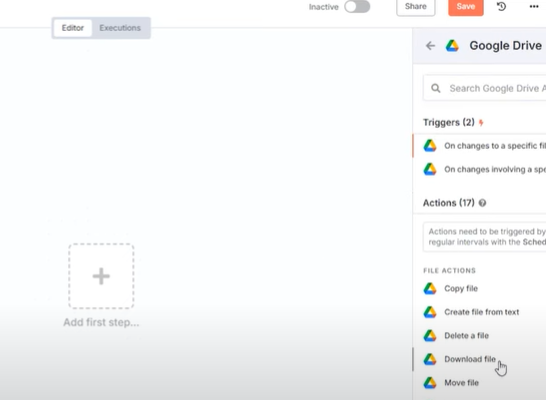
You will get this layout down below

We can’t do much though until we set up the Google Cloud portion of the tutorial.
Google Cloud Platform Setup
Go to the Google Cloud Platform and go to console
Create a New Google Cloud Project
In the console select open project picker
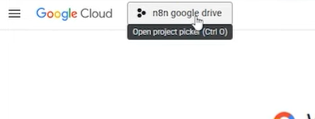
Click New Project

Set a project name and click create
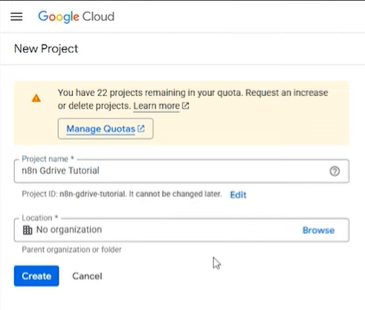
Open the Project Picker once again and make sure your new project is selected

Set up the Google Drive API
Back on the main screen, click the 3 lines in the top left. Select API & Services. Then click on Library
In the search bar, enter Google Drive. Select the Google Drive API and click on enable.

OAuth Consent Screen
Go back to your main screen once enabled and click on OAuth Consent Screen and Get Started.
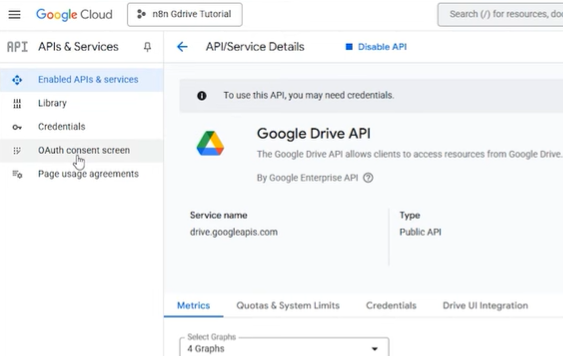
Enter in the App name, I used N8N Google Drive Tutorial. For Support email, I used my personal email. Click Next
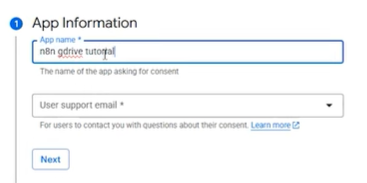
Click External application and Next. It’ll ask for your email once again. Then choose Next.
Select I Agree, Create, and Finish
Publish App in Audience Tab
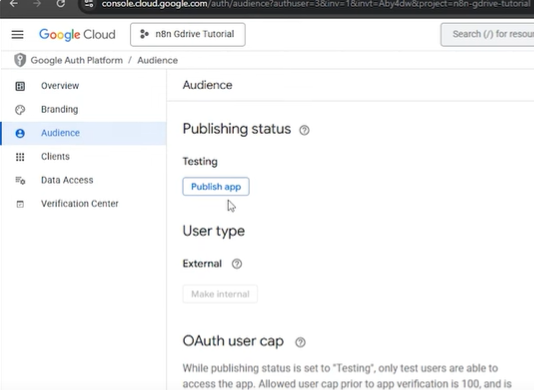
Go into the Audience tab and select publish app. Click Confirm
Set Up Credentials
Go back to APIs and Services and Select Credentials
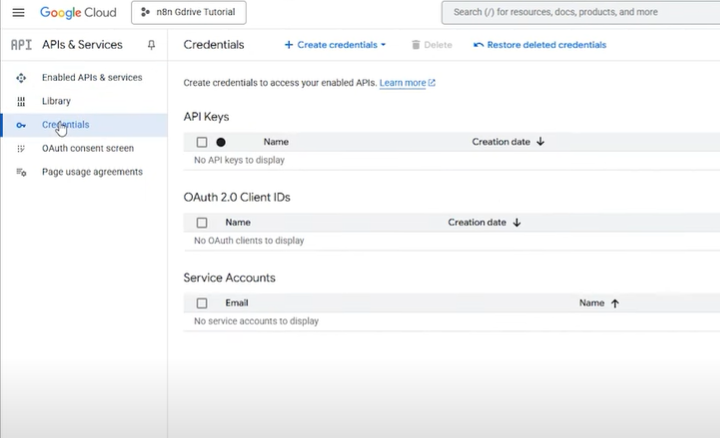
Click Create Credentials and select OAuth
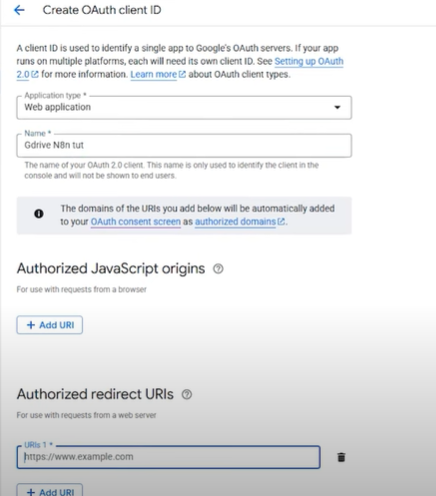
Select Web Application as application type and set a name.
Click add URI
Back to N8N
Select Create New Credential
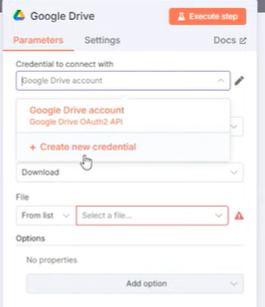
You will get this screen down below
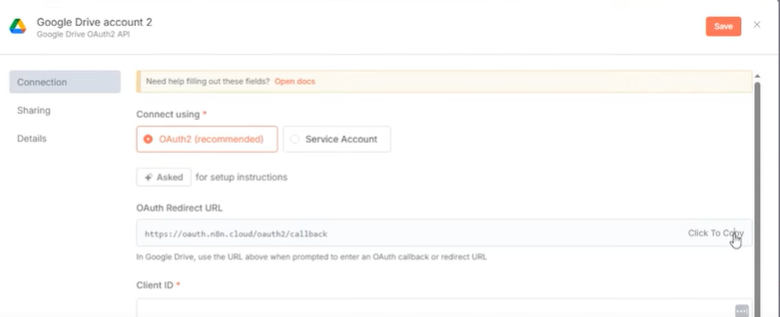
Copy the OAuth Redirect URL
Go Back to Google Drive and paste this in the URL and click Create.
A pop up will appear, copy (and save somewhere) the client id and client secret
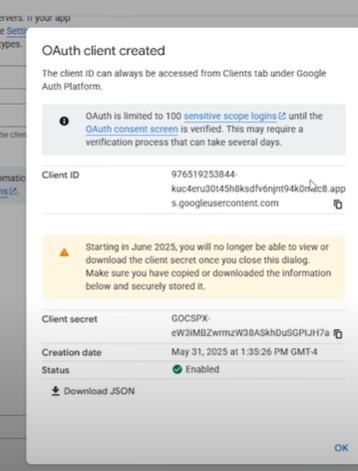
Now paste both of these values back in N8N

Click sign in with Google
Choose your cloud email. You may get a pop up that states Google hasnt verified this app. Click Advanced and go to N8N Cloud
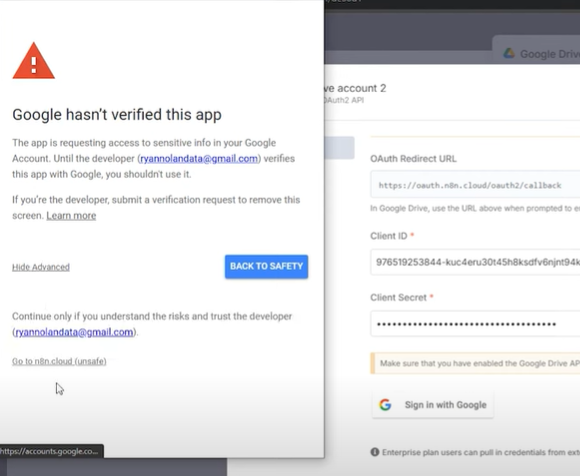
In the next screen select all and click continue.
Testing the Google Drive N8N Connection
The Google Drive setup should be complete. Let’s have a small test to ensure that it is working properly.
We will test if we can grab images within a google drive folder.
Create a folder in your Google Drive account and populate a few images. The ones I’m using are .jpg

Set up a manual trigger (if you haven’t already) and connect it to your google drive node.

After limit look for the specific folder in your drive.

If it works properly, in the output you’ll see the multiple images under the JSON (as pictured above).
That’s it. If you have any issues watch the video as it’s better than the article (in my opinion). Also we are taking on freelance customers and 1:1 mentorships. Check out the links above. If you want to connect with others interested in Data or AI join our discord server. Thanks for reading the article.
Ryan is a Data Scientist at a fintech company, where he focuses on fraud prevention in underwriting and risk. Before that, he worked as a Data Analyst at a tax software company. He holds a degree in Electrical Engineering from UCF.
